
What this part does
Several parts can create one grinding symptom because turning combines rotation, brake clearance, axle angle, tire clearance, and suspension load. The brake system controls wheel speed, the wheel bearing supports rotation, the CV axle transfers torque on driven wheels, and the suspension and steering hardware keep the tire pointed and located.
- Brakes create controlled friction at the rotor, so worn or misplaced parts can sound metallic.
- The dust shield and backing plate sit near rotating brake parts, so small bends can create scraping.
- The wheel bearing and hub carry vehicle load while the wheel rotates, so roughness can change under cornering load.
- The CV axle changes angle as the wheel steers, so joint wear may show up during low-speed turns.
- Steering and suspension joints control wheel position, so looseness can cause rubbing, grinding, or secondary tire contact.
Common failure signs

The pattern of the noise is more useful than the word grinding alone. A technician will want to know speed, steering angle, braking input, road surface, temperature only as a general condition, whether the noise comes from the front or rear, and whether warning lights appeared at the same time.
Noise only while turning left
A noise that appears only on left turns often means a component reacts to side load, steering angle, or wheel position. The cause may still be on either side because the loaded side, unloaded side, brake hardware, shield, axle angle, tire clearance, and suspension movement can each create contact or roughness.
Noise while braking and turning
Grinding while braking and turning puts brake pad condition, rotor condition, caliper movement, pad hardware, and backing plate contact higher on the inspection list. Brake noises can change in a turn because wheel load shifts and because small clearances around the rotor can change under suspension movement.
Noise while coasting through a turn
Grinding while coasting, with the brakes released, makes brake contact still possible but also raises wheel bearing, hub, CV axle, tire rub, suspension joint, and driveline checks. A coasting test helps separate brake-input symptoms from load-and-rotation symptoms.
Noise with vibration, clicking, scraping, or steering pull
- Vibration with grinding can point toward wheel-end, brake, tire, or driveline issues that need prompt inspection.
- Clicking or rhythmic grinding in a turn can raise suspicion around the outer CV joint or axle assembly, especially if it changes with steering angle.
- A scraping sound that appears after recent work may come from a bent dust shield, loose liner, misplaced clip, or wheel clearance contact.
- Steering pull, looseness, or clunking can move the inspection toward tie rods, ball joints, control arms, strut mounts, or alignment-related damage.
Common failure signs overlap, which is why the sound should be matched to braking input, steering angle, vehicle load, and visible wear. The strongest clues are repeatability, whether the noise changes when braking, whether the sound is rhythmic with wheel speed, and whether steering or braking feel changes.
| Likely area | Clues that support it | What still needs confirmation |
|---|---|---|
| Brake contact | Grinding during braking, scraping near rotor, recent brake work, brake warning behavior where applicable | Pad, rotor, caliper movement, and hardware inspection |
| Dust shield rub | Thin scraping sound, often after road debris or service, may change with slight steering input | Visual clearance around rotor and shield |
| Wheel bearing or hub | Growl, rumble, roughness, or grinding that changes with cornering load | Bearing noise, play, hub condition, and related sensor/wiring condition |
| CV axle | Clicking, popping, or grinding in tighter turns, possible torn boot or grease loss | Boot condition, joint movement, axle play, and road-test reproduction |
| Tire or liner rub | Noise at a specific steering angle, visible rub marks, loose liner, changed tire or wheel fitment | Wheel-well inspection through steering range |
| Suspension or steering wear | Clunk, pull, wandering, uneven tire wear, noise over bumps plus turning | Loaded joint inspection and alignment-related checks after repair |
Before replacing it
Many mechanical grinding noises do not set a diagnostic trouble code because worn pads, a rubbing dust shield, tire contact, or a rough bearing can be physical faults without a monitored electronic failure. No code does not rule out a brake, hub, axle, steering, or suspension problem.
Scan-tool diagnosis becomes important if the ABS, traction control, AWD, stability control, or electric power steering warning appears. Those systems may see wheel-speed, steering, driveline, or control faults that are related to the complaint, but codes should be interpreted alongside a physical inspection.
A warning light changes the diagnostic path; it does not automatically identify the grinding component.
Before replacing parts, confirm which system is making contact or noise. A Tucson with a grinding sound on left turns may not need the part the driver first suspects, because brake hardware, a shield, tire rub, a wheel bearing, and a CV joint can all sound similar inside the cabin.
- Confirm whether the noise occurs with braking, coasting, acceleration, or all three.
- Check for visible rub marks inside the wheel well and on tire shoulders.
- Look for loose splash shields, missing clips, hanging trim, or debris near the tire.
- Note any recent tire, wheel, brake, suspension, or alignment work.
- Record warning lights and whether they appeared before, during, or after the grinding.
Part replacement should follow evidence. Replacing a wheel bearing because the sound seems to come from one side can waste time if the actual issue is a rotor shield or tire liner contact. Replacing brakes without checking caliper movement and hardware can leave the same noise in place.
Inspection steps
A Hyundai Tucson grinding noise on left turns at low speed usually points to a wheel, brake, or axle issue that changes with steering load. The risk depends on whether the sound is light scraping, repeatable metal grinding, paired with vibration, or connected to braking, steering feel, or warning lights. Treat it as investigate soon, and stop driving if the noise becomes harsh, the vehicle pulls, the brake pedal changes, the steering feels loose, or a warning light appears.
The most common inspection zones are the front brakes, rotor dust shield, wheel bearing or hub, outer CV joint, tire and fender-liner clearance, ball joint, tie rod, control arm, strut mount, and AWD driveline components where equipped. Cabin sound direction can be misleading because noise travels through the body, subframe, and suspension. A left turn can load or unload either side depending on the fault, so inspection should not assume one side before testing.
First action: document exactly when the grinding happens, then check the visible tire, wheel-well, and warning-light conditions before any continued driving or parts replacement.

Stop-driving signs matter because grinding during a turn can involve parts that locate the wheel, slow the vehicle, or transfer drive torque. If the sound is metallic, worsening, or paired with vibration, brake symptoms, steering looseness, wheel heat, or warning lights, the Tucson should be inspected before continued driving.
| Symptom | Risk frame | Practical next step |
|---|---|---|
| Harsh metal grinding | Possible brake, shield, bearing, or contact issue | Avoid normal driving until inspected |
| Grinding with brake pedal pulsation, pull, or longer stopping feel | Brake system concern | Arrange brake inspection promptly |
| Grinding with steering looseness, clunking, or wandering | Steering or suspension safety concern | Do not continue high-speed or heavy-use driving |
| Grinding with ABS, traction, AWD, or steering warning light | Mechanical fault may be paired with an electronic system fault | Scan the vehicle and inspect the wheel-end systems |
| Light scrape after recent wheel, tire, or brake work | Possible liner, shield, wheel weight, or hardware contact | Check for obvious rub marks and schedule correction |
Book inspection soon if the grinding is repeatable at low speed, appears only on left turns, or is becoming easier to trigger. A repeatable noise is more useful diagnostically than a random one, but it should still be confirmed with a controlled inspection rather than guessed from the cabin.

The ranked list below is a diagnostic framework, not a confirmed fix. The exact cause depends on inspection, model year, drivetrain, tire size, recent service history, and whether the grinding happens with braking, coasting, acceleration, or a specific steering angle.
Brake pad, rotor, caliper, or hardware contact
The brake assembly clamps the rotor to slow the wheel, and it uses pads, caliper slides or movement, shims, clips, and backing hardware to keep contact controlled. Wear, corrosion, loose hardware, stuck movement, or pad material issues can create grinding that becomes more obvious during a turn.
Bent dust shield or backing plate rubbing the rotor
The dust shield sits close to the brake rotor and helps manage debris exposure around the wheel end. If it is bent by road debris, corrosion, or recent service, it can touch the rotor lightly and sound like a scrape or grind, especially when suspension movement changes the gap.
Wheel bearing or hub issue
The wheel bearing and hub support wheel rotation under vehicle load. When bearing surfaces wear or become rough, noise can change as the vehicle turns because side load shifts across the bearing. Do not assume the noisy side by cabin location alone; confirm with lift inspection and controlled rotation checks.
CV axle or outer CV joint wear
A CV axle transfers drive torque while allowing steering and suspension movement. The outer CV joint operates at larger angles during turns, so wear, boot damage, or grease loss can create clicking, grinding, or roughness while turning. Confirmation should include boot inspection, joint play checks, and symptom reproduction.
Tire rubbing, loose liner, or wheel clearance issue
The tire and wheel-well area need clearance through steering and suspension travel. A loose fender liner, broken splash shield, oversized or mismatched tire, loose trim, snow-packed liner, or shifted panel can rub at a specific steering angle and mimic a mechanical grind.
Ball joint, control arm, tie rod, or strut mount wear
Suspension and steering parts hold wheel position while the vehicle turns and absorbs road load. Wear in a ball joint, control arm bushing, tie rod, or strut mount can let the wheel move in a way that creates grinding, clunking, rubbing, or steering pull. These parts should be inspected before any alignment-only repair.
AWD or driveline concern on applicable models
On applicable AWD versions, driveline components can add noise paths during tight, low-speed turns. This should be handled cautiously because drivetrain layout and control strategy vary by model year and trim. A technician should verify tire matching, driveline condition, warning lights, and service information before naming an AWD component.
Owner checks should be limited to safe visual and documentation steps. Do not crawl under an unsupported vehicle, remove brake parts, or perform aggressive road tests to reproduce grinding. The goal is to gather useful clues for diagnosis, not to prove the failed component at home.
- Park safely, set the parking brake, and inspect the tire shoulders for fresh rub marks, cuts, bulges, or unusual wear.
- Look inside the wheel well with the steering turned enough to see the liner, splash shield, and loose clips without placing hands near moving parts.
- Check whether any plastic liner, mud flap, undertray edge, or trim piece is hanging near the tire.
- Write down whether the sound happens while braking, coasting, accelerating, or only at one steering angle.
- Note recent tire, brake, wheel, suspension, or alignment work because shifted shields and liners often appear after service.
- Record any ABS, traction, AWD, steering, brake, or stability-control warning lights.
If the wheel area is hot, the brake pedal feels different, the steering feels loose, or the sound is severe, stop the owner inspection and arrange professional diagnosis.
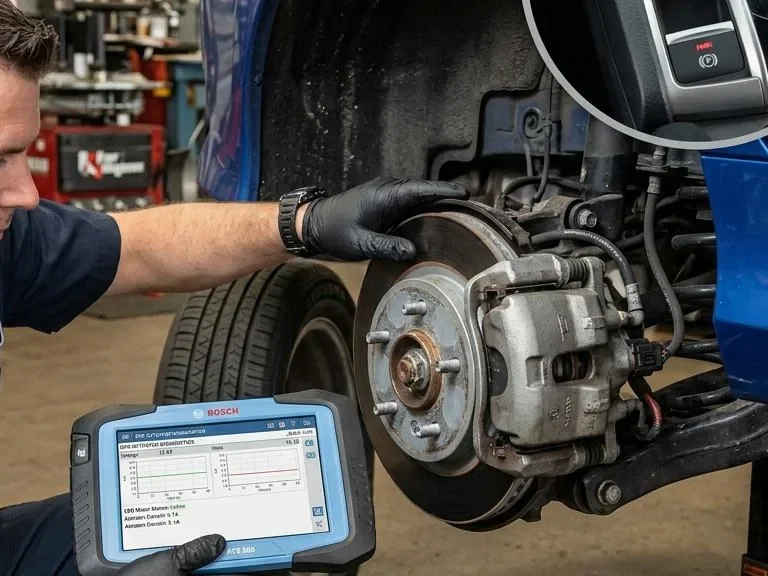
A technician diagnostic flow should start by reproducing the complaint safely, then move to lift inspection. The aim is to separate simple contact noises from safety-critical brake, bearing, axle, steering, suspension, or driveline faults.
- Confirm the complaint with the customer notes: speed range, steering direction, braking input, road surface, noise location, vibration, and warning lights.
- Perform a controlled road test only if the vehicle is safe enough to drive, listening for braking, coasting, and turning differences.
- Inspect tire size, tire condition, wheel fitment, wheel-well liners, splash shields, and visible rub points.
- Inspect brake pads, rotors, caliper movement, pad hardware, backing plates, and dust shields for contact or abnormal wear.
- Check wheel bearing and hub condition using approved service procedures and compare findings with noise behavior under load.
- Inspect CV axle boots, joint condition, axle movement, and signs of grease loss or impact damage.
- Inspect ball joints, control arms, tie rods, strut mounts, bushings, and steering linkage for looseness or shifted geometry.
- Scan for ABS, traction, AWD, stability, or steering faults if any related warning light is present.
- For applicable AWD models, inspect drivetrain-related causes cautiously and verify model-specific service information before naming a component.
After the failed area is confirmed, the repair should be verified with a road test that repeats the original left-turn condition. If suspension or steering parts were replaced, alignment and tire-wear checks may also be needed according to the repair path.
The fastest inspection starts with clear symptom details. Instead of asking for a guessed part, describe when the Tucson grinds, whether the sound changes with braking or coasting, whether it comes with vibration or steering pull, and whether any dashboard warnings appeared.
- Model year, mileage, trim if known, and whether the Tucson is front-wheel drive or AWD.
- Whether the grinding occurs only on left turns, both directions, or also straight ahead.
- Approximate driving situation such as parking lot, driveway, neighborhood turn, or tight maneuver.
- Whether the brake pedal is pressed, released, or lightly applied when the sound happens.
- Whether the sound is metallic grinding, light scraping, clicking, rumbling, or clunking.
- Any vibration, steering pull, loose steering feel, hot-wheel smell, or warning lights.
- Recent tire, wheel, brake, alignment, suspension, or collision-related work.
Use an internal symptom checklist or parts-search path if available, but keep the request focused on diagnosis: brake, wheel-end, axle, steering, suspension, and tire-clearance inspection before parts replacement.
Used parts require extra caution on wheel-end, steering, suspension, and axle repairs because hidden wear can recreate the same noise or add safety risk. If a used part is considered, match it by exact vehicle fitment and verify condition before installation.
- Confirm model year, trim, drivetrain, side, and part number compatibility before purchase.
- Avoid used brake wear parts; friction surfaces and hardware should be evaluated as service items, not guessed from photos.
- Inspect used hubs, knuckles, axles, control arms, and steering parts for impact damage, corrosion, damaged threads, torn boots, or sensor damage.
- Verify whether electronic sensors, tone rings, brackets, and connectors match the vehicle configuration.
- Use OEM service information or a qualified parts source when fitment is uncertain.
Related guides can help separate similar sounds without turning this article into a one-part diagnosis. Use them to compare patterns, then return to inspection logic before replacing anything.
- Hyundai Tucson brake grinding noise: use this when the sound changes with brake pedal input.
- Bad wheel bearing symptoms: use this when noise changes with vehicle load or wheel speed.
- CV axle clicking or grinding while turning: use this when clicking or roughness appears in tight turns.
- Steering and suspension noise diagnosis: use this when grinding comes with clunks, pull, wandering, or uneven tire wear.
- ABS and traction control warning light: use this when warning lights appear with the noise.
- Hyundai Tucson maintenance schedule: use this to check inspection intervals and maintenance context.
A Hyundai Tucson grinding noise on left turns at low speed is commonly investigated around the front brakes, wheel-end components, CV axle, tire clearance, and suspension or steering hardware, but the exact cause depends on inspection. Stop or limit driving if the noise is metallic, worsening, paired with vibration, brake symptoms, steering looseness, wheel heat, or warning lights. The next step is a brake, wheel-end, axle, steering, suspension, and tire-clearance inspection before replacing parts.
Replacement notes
Replacement direction depends on the confirmed failure. Brake-related repairs should address the worn or contacting parts and the hardware that allowed the noise. A shield or liner contact repair may be a correction rather than a major parts replacement. A bearing, CV axle, steering, or suspension repair should follow verified service information for the exact Tucson configuration.
- If brakes are confirmed, inspect pads, rotors, caliper movement, hardware, and shields together.
- If a dust shield or liner is confirmed, correct the contact point and verify clearance through the steering range.
- If a wheel bearing or hub is confirmed, verify related sensor wiring and hub condition before closing the repair.
- If a CV axle is confirmed, inspect the boot, joint condition, and related seals or mounting points according to service information.
- If suspension or steering wear is confirmed, verify alignment needs and tire condition after repair.
- If AWD-related behavior is suspected, confirm drivetrain applicability before replacing any driveline component.
The final quality check should repeat the same low-speed left-turn condition that produced the complaint. A quiet straight-line test alone is not enough when the original symptom happened only under steering load.
FAQ
Can I keep driving my Hyundai Tucson if it grinds only on left turns?
Limit driving and arrange inspection if the grinding is metallic, repeatable, worsening, or paired with vibration, brake symptoms, steering looseness, heat, or warning lights.
Does grinding on a left turn mean the left wheel bearing is bad?
Not necessarily. Cabin sound direction can be misleading, and turning load can change noise on either side depending on the fault.
Could a brake dust shield make a grinding noise?
Yes. A bent shield or backing plate can rub the rotor and create a scrape or grind, especially after debris or recent service.
Will a scan tool find the cause of a grinding noise?
Only sometimes. Warning-light codes can help, but many mechanical grinding faults do not set diagnostic trouble codes.


Comments
Be the first to add a practical repair note or follow-up question.