
What this part does

The Encore cooling system carries heat away from the engine through coolant passages, hoses, the radiator, the coolant reservoir or surge tank, the thermostat area, the water pump, and related coolant lines. A leak matters because the system depends on a sealed coolant path; once the level drops, heat transfer becomes unreliable and overheating can follow even if the vehicle still drives normally for a short time.
Not every hose or duct in the same area carries coolant. A large rubber duct may carry intake air, while smaller nearby hoses or a plastic coolant outlet can be part of the cooling circuit. That is why the search should follow wet residue, hose routing, and confirmed coolant loss rather than replacing a part just because it sits near the spray pattern.
Use the owner manual and OEM service information for coolant type, fill method, bleeding procedure, and service precautions. Do not assume a universal coolant, cap procedure, or bleed sequence applies to every engine configuration.
Common failure signs

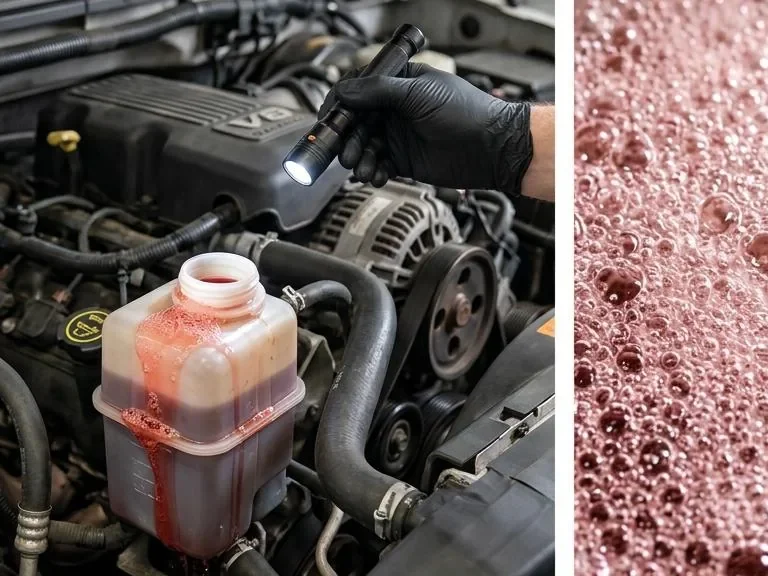
Coolant leaks on a 2015 Buick Encore usually show up as a puddle, coolant smell, low reservoir level, steam, overheating, poor heater output, or a pattern of repeated top-offs. A clear water drip after A/C use can be normal condensation, but coolant usually leaves color, odor, sticky residue, or a falling coolant level.
- Puddle under the front of the vehicle: check the radiator, lower hose area, reservoir, outlet area, and under-engine splash paths.
- Sweet smell after driving: inspect the reservoir cap, radiator end tanks, hose ends, heater hoses, and any dried residue near hot engine parts.
- Low coolant with no obvious puddle: suspect a pressure-only seep, heater core path, evaporated coolant residue, or a leak that only opens hot.
- Steam from the engine bay: stop driving, let the vehicle cool, and inspect only after there is no visible steam or pressure risk.
- Poor heater output with coolant loss: treat it as a warning sign because low coolant can reduce cabin heat and engine cooling at the same time.
- Repeated top-offs: do not keep refilling without diagnosis; the leak source needs confirmation before the system is trusted.
Coolant-related DTCs, thermostat-performance codes, coolant-temperature codes, overheating messages, or misfire codes can support diagnosis, but they do not prove the leak location. A scan result should guide inspection, not replace visible leak tracing and pressure testing.
Before replacing it

Before replacing a hose, reservoir, outlet, radiator, or water pump, confirm where the coolant starts leaking. Coolant can run along plastic covers, brackets, hoses, and the undertray before it drips, so the lowest wet spot is often not the failed part. The best starting point is the highest fresh wet area found during a cold inspection or pressure test.
- Reservoir or cap: look for wet seams, stains around the cap, cracks in the plastic, or coolant pushed out near the overflow area.
- Hoses and clamps: check hose ends first because seepage often appears at the clamp, fitting, or molded bend before the hose body looks damaged.
- Radiator: inspect the tanks, seams, drain area, and hose necks for dried residue or wet tracks.
- Thermostat housing or coolant outlet: inspect the plastic outlet area and the smaller coolant hoses connected to it before blaming a nearby intake duct.
- Water pump area: look for residue, fresh wetness, or coolant trails near the pump path, but avoid calling it a pump failure without confirmation.
- Turbo coolant lines: inspect coolant hoses and fittings around the turbocharger circuit if equipped or visible in the service layout.
- Heater core and heater hoses: check for damp carpet, sweet interior odor, windshield film, or wet heater hose connections at the firewall.
- Internal leak indicators: look for unexplained coolant loss, white exhaust smoke, oil or coolant contamination, bubbles, misfires, or overheating that returns after refill.
Forum-style advice can be useful for search wording, especially when an owner suspects a lower radiator hose, but it is not a verified diagnosis. Use it as a clue to inspect the coolant outlet, hose routing, and residue path rather than as permission to replace parts blindly.
Inspection steps
A safe inspection starts cold and moves from easy visual checks to controlled testing. Owners can document visible evidence, but technicians should confirm hidden, pressure-only, or internal leaks with the proper test equipment and service information.
Owner-safe cold checks
- Park on a level surface and let the engine cool fully before touching the coolant cap or nearby parts.
- Check the reservoir level through the tank and note whether the level is dropping between drives.
- Use a flashlight to inspect the reservoir, cap area, upper and lower hose ends, radiator edges, thermostat housing or coolant outlet area, heater hoses, and visible turbo coolant line connections.
- Look under the vehicle for the first wet spot, then trace upward because coolant often travels before it drips.
- Photograph residue, puddle location, warning messages, gauge behavior, steam, odor, and any recent top-off history.
- Do not continue running the engine if the temperature warning appears, steam is present, or coolant is visibly escaping.
Technician confirmation
- Confirm the complaint, coolant level history, visible residue, warning lights, and any stored or pending codes.
- Pressure test the cooling system cold and inspect each component while the system is held under controlled test conditions.
- Test the cap or reservoir sealing point when residue suggests coolant is escaping near the surge tank.
- Use UV dye when the leak is intermittent, hidden by the undertray, or only visible after a heat cycle.
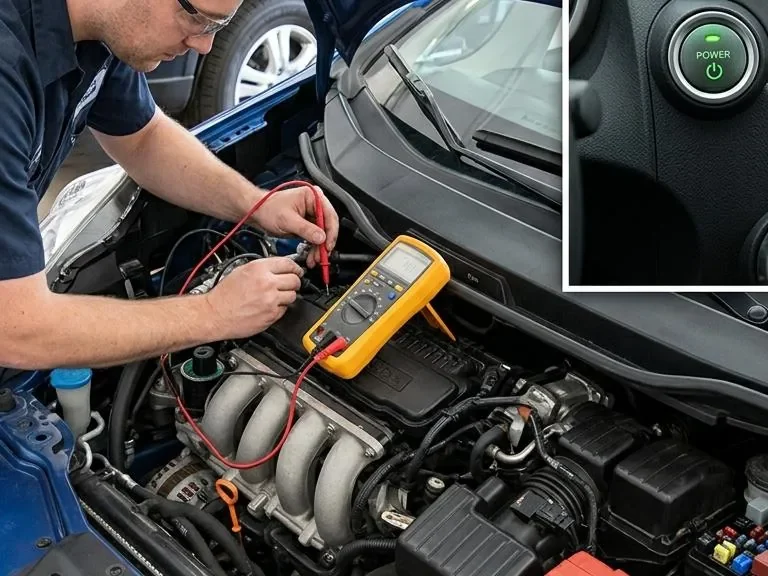
- Review scan data and warning history to see whether thermostat performance, coolant temperature behavior, fan operation, or misfire evidence supports a wider diagnosis.
- If no external leak is found, check for internal leak indicators before replacing external parts.
Pressure testing, cap testing, UV dye, scan data, and component-by-component inspection are confirmation tools. They should be used to prove the source, not to justify replacing a guessed part.
Used cooling-system parts are risky when the failure involves plastic, seals, caps, hoses, or heat-aged fittings. A used part can look clean and still leak once hot and pressurized, so new seals and verified part fit matter more than saving effort on a component that is already hard to access.
| Part type | Check before buying | Practical judgment |
|---|---|---|
| Reservoir or cap | Inspect sealing surfaces, cap fit, cracks, staining, and plastic discoloration. | Prefer new if the old part failed from age, pressure loss, or cracked plastic. |
| Thermostat housing or coolant outlet | Check hose nipples, mounting ears, seal grooves, and hairline cracks. | Used plastic outlets are often a poor gamble unless condition and part number are clearly verified. |
| Radiator | Inspect tank seams, hose necks, mounting tabs, fin damage, and signs of prior sealant. | A pressure-tested replacement is more defensible than a visually clean unknown radiator. |
| Hoses and clamps | Check swelling, oil softening, cuts, flattened clamp areas, rust, and distorted ends. | Hoses, clamps, and seals are usually better replaced new than reused. |
| Water pump | Check shaft play, pulley condition, residue at the weep area, and gasket surface condition. | A used pump rarely makes sense when labor and repeat-leak risk are considered. |
Verify the exact engine configuration and existing part marking before buying. A visually similar coolant fitting, hose, or outlet can differ by engine, production change, or emissions configuration.
Replacement notes
Replacement should follow confirmation, not suspicion. A leaking cap, hose, radiator, coolant outlet, thermostat housing, water pump, heater hose, or turbo coolant line should be repaired only after the wet source, pressure-test result, or inspection evidence points to that part.
- Top off only with the coolant type and mixture specified by the owner manual or OEM service information, and only when the system is cool.
- Monitor only if the level drop was minor, no warning appeared, and a cold inspection finds no active leak; repeated top-offs need diagnosis.
- Pressure test when the leak is not obvious, appears only after driving, or seems to spray from a nearby part.
- Replace the confirmed failed component and its required seals, clamps, or related hardware according to service information.
- Flush or bleed the system only when specified by OEM service procedures, after contamination, or after a repair that requires it.
- Recheck the level after the system cools, inspect for fresh residue, and verify that warning messages or overheating do not return.
Internal leak signs need deeper testing before repair decisions. White exhaust smoke, coolant contamination, oil contamination, persistent unexplained coolant loss, repeat overheating, or misfires with coolant loss should not be treated as a simple hose problem.
FAQ
These are the practical questions owners usually have when a 2015 Buick Encore leaks coolant but the wet source is not obvious. The answer depends on whether the leak is slow and visible, hidden and pressure-only, or severe enough to create overheating.
Can I drive a 2015 Buick Encore with a coolant leak?
Do not drive it if the engine is overheating, steaming, losing coolant quickly, showing a temperature warning, or running with no visible coolant in the reservoir. If the leak is minor and the engine stays cool, drive only as little as needed to reach a safe inspection point.
Does a check engine light tell me where the coolant is leaking?
No. A code can show coolant temperature, thermostat performance, overheating, or related drivability evidence, but it does not identify the exact external leak point. The wet source still needs visual inspection, pressure testing, or dye confirmation.
What if the leak looks like it comes from a large hose near the engine?
Do not assume the largest nearby hose carries coolant. Some large ducts carry intake air, while smaller hoses and a plastic coolant outlet may carry coolant. Trace the wettest point and confirm the hose function before replacing it.
Why do I smell coolant but see no puddle?
Small leaks can evaporate on hot parts, collect in the undertray, or open only when the system is hot and pressurized. Check for dried residue around the reservoir, radiator, hose ends, heater hoses, outlet area, and water pump path, then pressure test if nothing is obvious.
When should an internal engine leak be considered?
Consider deeper testing when coolant loss continues with no external leak, or when there is white exhaust smoke, oil or coolant contamination, bubbles, misfires, repeated overheating, or poor heater output after refilling. These signs do not prove an internal failure, but they justify professional testing.

Comments
Be the first to add a practical repair note or follow-up question.