
Common failure signs
After separating Rotor runout from Disc thickness variation, the next step is to match the fault pattern to what the driver actually feels. The symptom location often helps narrow the source before any measurements begin.
- Steering wheel shake during braking often points toward front brake or front-end involvement, because forces at the front axle are transmitted directly into the steering system.
- Brake pedal pulsation is commonly described as a rhythmic push-back through the pedal. That can fit rotor-related variation, but it still needs confirmation rather than assumption.
- A vibration felt through the whole vehicle, seat, or body shell is broader and should not be pinned on the Brake rotor alone. Tires, suspension joints, Wheel bearing play, or rear brake issues can create a similar complaint.
- If the shake appears only under braking, that keeps the brake system high on the list. If it is present while cruising as well, inspect non-brake causes more carefully.
Before replacing it
The symptoms above can point you toward a brake vibration problem, but Rotor runout usually does not trigger a dedicated trouble code by itself. A Brake rotor with Lateral runout can cause Brake pedal pulsation or Steering wheel shake during braking, yet the fault often remains a mechanical issue confirmed by measurement rather than scan data.
If an ABS, stability control, or wheel-speed warning light is on, treat that as a separate diagnostic path. Those warnings can come from sensor, tone ring, wiring, module, or Wheel bearing related faults, and they should not be blamed on the Brake rotor without supporting inspection data. If your vehicle also has an ABS light, this is the point where an internal ABS warning light diagnosis link fits naturally.
Do not assume warning lights prove rotor damage. Scan for codes, inspect the affected corner, and compare the electronic fault with physical checks at the Hub face, rotor mounting, and bearing for a confirmed cause.
Inspection steps
New rotors shaking usually points to the installed rotor not running true on the hub, though rotor runout is only one possible cause of brake vibration. The first check is hub condition and wheel clamping, because new rotors can still shake if they do not sit perfectly true on the hub, if the hub face is dirty or damaged, if lug torque distorts the rotor, or if another component such as a bearing or caliper is contributing. Rotor runout is side-to-side wobble of the rotor as it turns; it is measured at the rotor face with a dial indicator and compared with OEM limits. That measurement matters because runout is about how the rotor rotates on the vehicle, not whether the part looked new in the box.
Rotor runout is side-to-side wobble of the rotor as it turns; it is measured at the rotor face with a dial indicator and compared with OEM limits. That matters because the issue is how the brake rotor rotates on the vehicle, not whether it looked new in the box.
Yes, new rotors can still be part of a brake vibration problem, and that is frustrating when you have already replaced parts. In many cases, the issue is not that the Brake rotor is automatically defective. The more common problem is Rotor runout in the installed rotor-and-hub assembly, or another fault nearby such as contamination on the Hub face, uneven wheel torque, Wheel bearing play, pad deposits, or a suspension issue that shows up during braking.
That can feel like Steering wheel shake, Brake pedal pulsation, or a general vehicle vibration, depending on where the fault sits and how severe it is. The key point is simple: replacing one part does not guarantee the root cause is gone. Before blaming the new rotors or buying another set, it is better to confirm whether Lateral runout or a related brake or front-end problem is still present.
Brake rotor runout means the Brake rotor wobbles slightly side to side as it turns, and the first practical step is to check how true the installed rotor sits on the hub instead of assuming the new part is automatically defective. That matters early because even a small installed misalignment can contribute to Brake pedal pulsation, Steering wheel shake, and repeat comebacks if the real cause is still on the vehicle.
In plain language, Rotor runout is Lateral runout: the rotor does not rotate in one perfectly flat plane, so its face moves in and out as the wheel assembly turns. It is measured on the installed rotor or, when needed, the hub assembly itself, because the condition often comes from how the rotor mates to the Hub face rather than from the rotor alone. A technician typically checks it with a dial indicator and compares the reading to the OEM service specification for that vehicle. If the exact limit is not known, it should be verified in factory service information. This is also different from Disc thickness variation, which is a thickness change rather than a side-to-side wobble.
A new Brake rotor can still cause Brake pedal pulsation or Steering wheel shake if the installed rotor-and-hub assembly is not running true. In other words, rotor quality is only one part of the result. The way the rotor seats on the Hub face, how the wheel clamps it, and whether nearby parts stay stable under load all affect whether vibration remains or returns.
- Hub face contamination: Rust scale, dirt, paint buildup, or a small nick between the Hub face and the Brake rotor can keep the rotor from sitting perfectly flat, creating Lateral runout right after installation.
- Uneven wheel clamping: If lug nuts are tightened unevenly or the wheel does not seat squarely, clamping force can distort the installed position of the rotor and trigger vibration even with new parts.
- Tolerance stack-up or poor rotor indexing: A slightly imperfect hub and a slightly imperfect rotor can combine into noticeable Rotor runout once assembled, so indexing and measurement are more useful than assumptions.
- Wheel bearing movement: A worn or loose Wheel bearing can let the rotor shift as it rotates, which can mimic or worsen a rotor problem.
- Uneven pad contact: A small mounting error can lead to uneven pad transfer over time, which may later contribute to Disc thickness variation and bring the shake back.
One common reason a new Brake rotor still produces Brake pedal pulsation or Steering wheel shake is that it is not sitting perfectly flat against the Hub face. Rust scale, packed dirt, old corrosion flakes, or a small nick on the mounting surface can create a slight stand-off point between the hub and rotor hat. That small seating error can show up as Lateral runout once the assembly turns, even when the rotor itself is new.
This is why cleaning and inspection matter before blaming the replacement part. The Hub face and rotor mounting surface should be cleaned and checked using the vehicle maker's service procedure, with attention to debris, burrs, and obvious damage. The goal is a clean, flat contact surface, not aggressive material removal. Heavy grinding, filing, or improvised resurfacing can damage the Hub face and create a new runout problem instead of fixing the original one.
Even if the Brake rotor and Hub face are clean, uneven lug nut torque can still introduce Lateral runout into the installed stack. The issue is not usually the wheel fastener itself, but how uneven clamping load can pull the wheel and rotor assembly into a slightly distorted seated position. That can leave a driver chasing Brake pedal pulsation or Steering wheel shake after new parts are already fitted.
This is why wheel installation matters during diagnosis. Lug nuts should be tightened in the correct sequence and brought to final torque with the vehicle manufacturer’s specification, not guessed by feel or unevenly applied with an impact tool alone. Wheel seating also needs a clean, flush contact surface so the wheel centers properly against the hub.
If vibration changes after a wheel has been removed and reinstalled, verify wheel seating and torque procedure before assuming the new Brake rotor is defective.
Even when the Hub face is clean and wheel torque is correct, Rotor runout can still come from tolerance stack-up between the hub and the Brake rotor. Each part may be acceptable on its own, yet their high and low spots can add together once assembled. That is why a new Brake rotor can still contribute to Brake pedal pulsation or Steering wheel shake after installation.
Rotor indexing is a service step used on some vehicles to reduce that combined error. The basic idea is to remove the Brake rotor, rotate it to a different position on the hub, reinstall it, and recheck Lateral runout with the proper measuring method. In some cases, one clock position runs truer than another. Exact procedures and allowable readings vary by vehicle, so this step should be verified against the service information rather than treated as a universal fix.
If runout changes noticeably during indexing, the issue may be in the rotor-to-hub relationship rather than the rotor alone.
If the Hub face is clean, wheel torque is correct, and Rotor indexing has already been considered, the next place to look is the support behind the Brake rotor. A worn Wheel bearing or a damaged hub flange can keep the rotor from tracking true, which can create Lateral runout even when the new Brake rotor itself is not the root problem.
This usually shows up as Brake pedal pulsation, Steering wheel shake, or a vibration that changes as the vehicle loads and unloads through a turn. Some vehicles may also develop a hum, roughness, or a loose-feeling front corner, but those clues should support the diagnosis rather than replace measurement.
Not every brake vibration points to a Wheel bearing. If bearing play or hub flange damage is suspected, a technician should verify it directly and compare the pattern with other wheel bearing symptoms before replacing more brake parts.
Not every post-replacement vibration points back to Rotor runout alone. Uneven pad material transfer on the Brake rotor can create a friction variation that feels very similar to Brake pedal pulsation or a light Steering wheel shake, especially once the brakes are warm. That is why a rotor that looks new can still produce a repeated complaint.
Caliper drag is another common false lead. If a caliper, slider, or pad is not releasing cleanly, heat can build on one corner and keep reprinting the same symptom even after new parts. In that case, replacing the Brake rotor without correcting the drag source often leads to a quick comeback.
- Look for uneven pad contact, discoloration, or signs that one side has been running hotter than the other.
- Treat bedding as a verify-first step: use the vehicle maker or pad manufacturer procedure when available rather than a generic hard-stop routine.
- If symptoms return after new rotors and pads, inspect friction condition alongside the Hub face, Wheel bearing, and Lateral runout checks instead of assuming the rotors are warped again.
These terms are related, but they are not the same fault. Rotor runout describes side-to-side movement of the Brake rotor as it rotates. Disc thickness variation describes uneven thickness around the disc, which changes how the pads load the rotor during braking and can lead to Brake pedal pulsation or Steering wheel shake.
- Rotor runout is a geometric alignment issue in the rotating assembly, often tied to the Hub face, rotor seating, wheel torque, or Wheel bearing support.
- Disc thickness variation is a wear or friction-result issue, where some parts of the disc effectively act thicker or thinner than others during braking.
The key link is that Lateral runout can help create Disc thickness variation over time. If the rotor does not run true, pad contact may become uneven with repeated use, gradually leaving the disc with inconsistent thickness or friction behavior. That is why a vehicle can start with a runout problem and later feel like a thickness-variation problem unless both the root cause and the rotor condition are checked.
In most cases, the ranking starts with installation-related causes, but the order can shift with vehicle history, where the vibration is felt, and whether it appears only under braking or also at speed.
- Dirty or corroded Hub face. This is often the first place to look because debris trapped between the hub and Brake rotor can create Lateral runout as soon as the new parts are installed. A brake shake that starts immediately after the job is a strong clue.
- Uneven wheel torque or poor rotor seating. If the wheel was tightened unevenly or the rotor was not fully seated during assembly, the rotor-and-hub stack can clamp together slightly distorted, leading to Brake pedal pulsation or Steering wheel shake.
- Rotor-hub stack-up or hub-related runout. Even with a new Brake rotor, an underlying hub issue or accumulated tolerance stack can keep Rotor runout in the assembly. If cleaning and re-seating do not change the symptom, this becomes more likely.
- Wheel bearing play or hub movement. A loose or worn Wheel bearing can let the rotor wobble under load, which can mimic or worsen a rotor problem and may change with cornering or road load.
- Pad deposits or caliper drag. If the pads are not releasing cleanly, friction material can transfer unevenly and act like Disc thickness variation, especially when the shake returns after some driving.
- Non-brake vibration source. If the symptom is present with little or no brake input, inspect tires, suspension, or steering components before blaming the Brake rotor again.
Before moving into technician measurements, owners can still narrow the pattern safely. The key is to observe when the Brake pedal pulsation or Steering wheel shake appears: only during braking, only at certain road speeds, after a longer drive, or together with a warning light. That pattern helps separate a Brake rotor or Rotor runout concern from a broader wheel, tire, or suspension issue without repeating parts replacement too early.
- Note whether the vibration happens only while braking or if it can also be felt while cruising.
- Pay attention to whether the vehicle pulls to one side, the brake feel changes, or stopping distance seems worse than normal.
- After parking safely, look for an obvious hot-brake smell, fresh fluid near the wheel area, or visible signs that one wheel may be running much hotter than the others.
- Watch for grinding, scraping, or clunking noises, which can point beyond Lateral runout alone.
- Do not remove wheels or disassemble brake parts just to inspect them unless the vehicle is already being serviced properly.
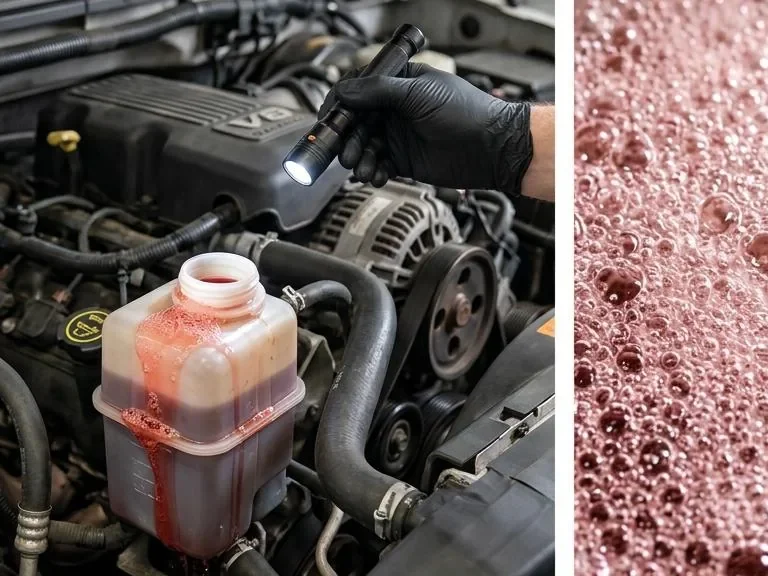
Stop driving and arrange service if the vibration becomes severe, the vehicle pulls during braking, a brake or ABS warning light comes on, or you notice fluid leakage. Those signs move the problem out of owner-check territory and into immediate diagnosis.
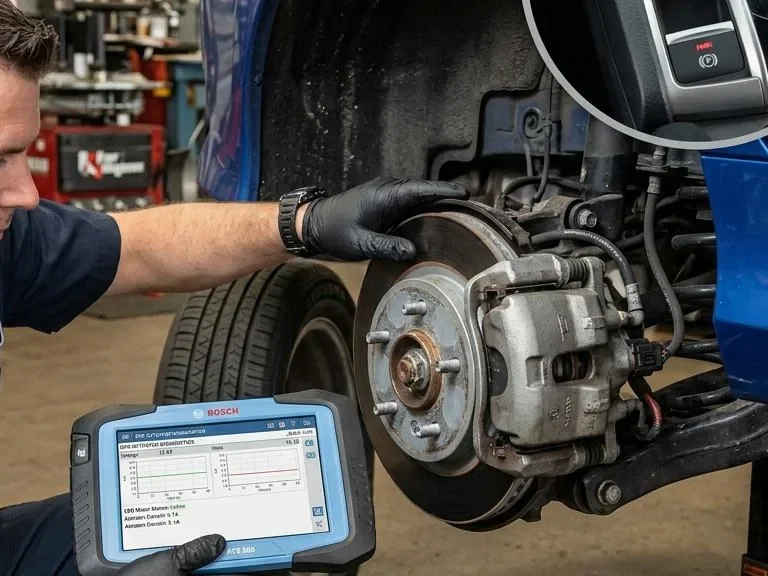
A technician should confirm whether the Brake rotor and hub assembly has measurable Lateral runout before any more parts are replaced, because repeated brake vibration can point to an installation fault or a related component issue that needs prompt correction. The first practical step is to mount a dial indicator at the service-manual measurement points and check Rotor runout, then verify whether the Hub face or the hub itself is contributing to the reading.
- Measure rotor-and-hub runout at the exact locations and setup described by the OEM service information, and repeat as needed after rotor indexing if the reading suggests a stack-up issue.
- Inspect the Hub face for rust scale, debris, coating residue, or damage that can keep the Brake rotor from seating flat.
- Check Wheel bearing play, rotor seating, caliper slide movement, pad condition, and any uneven pad deposits that could mimic or worsen Brake pedal pulsation.
- Confirm wheel torque was applied evenly and in the correct pattern, because uneven clamping can distort the installed rotor position.
- Compare every reading with OEM runout limits, thickness requirements, and machining guidance before deciding whether cleaning, re-indexing, machining, or replacement is appropriate.
This measurement-first approach helps separate true Rotor runout from Disc thickness variation and avoids treating Steering wheel shake as a rotor problem when another brake or front-end fault is still present.
If Brake pedal pulsation or Steering wheel shake remains after a recent Brake rotor job, or comes back soon after, it is time to stop treating the problem as a simple parts issue. At that point, the goal should be a measurement-led inspection of the rotor-and-hub assembly, not another round of guesswork.
- Schedule an inspection if the vibration persists after new rotors or pads.
- Book it sooner if the symptom returns quickly after replacement.
- Treat severe shake during braking as a priority, especially if it changes your confidence in stopping.
- Do not ignore brake vibration that appears with pulling, scraping noise, unusual heat, or a warning light.
- Ask for checks that include Rotor runout, Lateral runout at the installed assembly, Hub face condition, wheel torque pattern, and Wheel bearing play.
That approach helps separate Disc thickness variation from Rotor runout and reduces the chance of repeating the same repair. If the brake system has already been serviced once and the symptom is still present, a proper inspection is usually the safest and most cost-effective next step.
Replacement notes
After the measurement-focused checks above, the safest path is to confirm the complaint in order and rule out the largest false branches before replacing more parts.
- Confirm the symptom conditions first. Note whether the vibration appears only during braking, whether it shows up as Brake pedal pulsation, Steering wheel shake, or both, and whether it changes with light versus firmer brake application.
- If the vehicle also vibrates when you are not braking, step out of the brake diagnosis lane and inspect wheel, tire, and suspension contributors first. A non-brake vibration can overlap with a brake complaint and mislead the repair.
- Inspect basic installation points next. Make sure the Brake rotor is fully seated on the Hub face, wheel mounting was even, and there is no visible rust, scale, or trapped debris between the rotor and hub.
- Measure Lateral runout at the rotor-and-hub assembly, then re-index the Brake rotor if needed to see whether the reading improves.
- If runout remains, inspect Wheel bearing play, hub condition, pad contact pattern, and caliper slide or release behavior. These checks help separate mounting error from support or brake hardware faults.
- If the early checks pass but the shake remains, the next sensible confirmation step is to compare the measured brake assembly condition with signs of Disc thickness variation before deciding whether to clean, re-index, repair related hardware, or replace parts again.
Once the cause is measured, the repair should match that fault rather than default to another Brake rotor set. If Lateral runout is confirmed at the rotor-and-hub assembly, replacing rotors alone may not solve Brake pedal pulsation or Steering wheel shake when the Hub face, wheel torque, caliper hardware, or Wheel bearing is still contributing.
- Low-risk service fixes can include cleaning corrosion or debris from the Hub face, re-indexing the rotor on the hub, and tightening the wheel evenly to the vehicle’s specified pattern and torque.
- If the rotor can be machined, that decision should be verified against manufacturer guidance and rotor condition, not assumed.
- If parts are damaged, heat-spotted, or still out of spec after setup corrections, replacement may be required.
- If runout is not the only finding, inspect the caliper, slides, pads, Wheel bearing, and relevant suspension parts before repeating the same repair.
For related context, see the brake rotor replacement and brake pad and rotor inspection guides. The practical next step is to use the measurement results to confirm whether cleanup and re-indexing are enough, or whether the fault path has moved upstream into the hub, bearing, or brake hardware.
FAQ
After the inspection and repair steps above, these are the follow-up questions that matter most. The key point stays the same: a new Brake rotor does not rule out Lateral runout elsewhere in the rotor-and-hub assembly, Disc thickness variation, or another fault that creates Brake pedal pulsation or Steering wheel shake.


Comments
Be the first to add a practical repair note or follow-up question.