
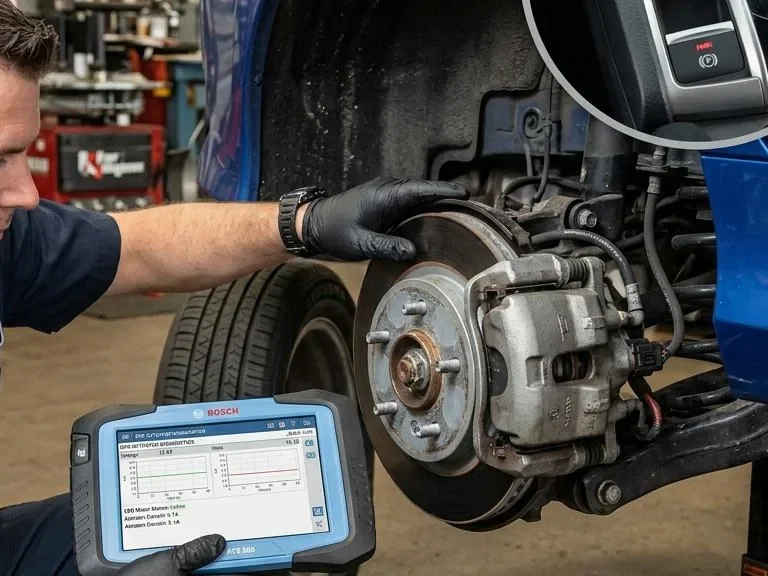
What this part does
The brake caliper holds the pads and uses hydraulic pressure to press them against the rotor. Brake fluid transfers force from the pedal and master cylinder to the caliper. Air compresses, brake fluid should not, which is why even a small trapped air pocket can make the pedal feel spongy or long.
After caliper replacement, the goal is not just to push fluid through the bleeder. The goal is to remove air from the repaired part of the hydraulic circuit, confirm the connection seals, and restore a firm pedal before any controlled movement of the vehicle.
Common failure signs

- Spongy pedal: often points to air in the caliper, line, hose, or ABS hydraulic unit.
- Low pedal after repeated bleeding: check bleeder orientation, caliper side, fluid level, and whether air entered more than one circuit.
- Pedal slowly sinks: inspect for external leaks and consider master cylinder bypass or another hydraulic fault.
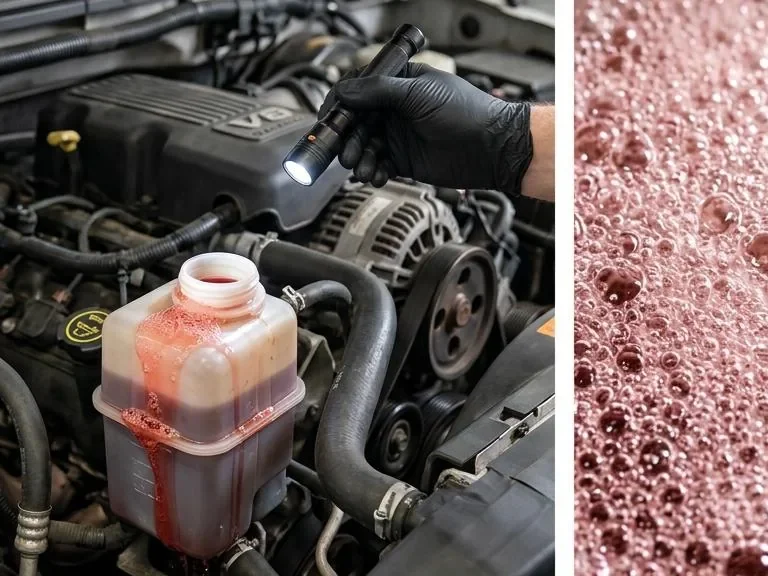
- Fluid near the hose, banjo bolt, bleeder, or caliper body: stop and repair the leak before further bleeding.
- Brake, ABS, or stability-control warning light: scan the system before assuming a normal manual bleed will finish the repair.
| Symptom | Likely cause family | Next check |
|---|---|---|
| Spongy pedal with bubbles at bleeder | Air still in hydraulic circuit | Continue correct bleeding while keeping reservoir full |
| No bubbles but pedal still low | Wrong caliper orientation, pad seating, hose issue, or ABS-trapped air | Verify bleeder at top, inspect installation, check OEM procedure |
| Pedal sinks slowly | Leak or master cylinder hydraulic fault | Inspect for fluid loss and stop DIY diagnosis if uncertain |
| Warning light after repair | ABS or brake control fault may be stored | Scan codes and follow vehicle-specific service information |
Before replacing it

- Confirm the replacement caliper is the correct side and fitment for the vehicle.
- Verify the bleeder screw is generally at the highest bleed point on the caliper.
- Check the brake hose is not twisted, kinked, stretched, or rubbing.
- Inspect the hose connection, copper washers where applicable, flare fittings, and bleeder screw for wetness.
- Confirm pads are seated correctly against the rotor and all hardware is installed as intended.
- Check the reservoir level often and use only the OEM-specified brake fluid type.
- Look for brake, ABS, or stability-control warning lights before continuing.
Do not mix incompatible brake fluid types, guess the fluid specification, or reuse fluid that has been exposed to dirt or moisture. If the manual, cap marking, and service information disagree, stop and verify the correct specification for the exact vehicle.
- Use vehicle-compatible brake fluid if the reservoir needs topping up during bleeding.
- Use a clear bleed hose, catch bottle, suitable bleeder wrench, or pressure/vacuum bleeding kit when basic manual bleeding is not controlled enough.
- Replace leaking hoses, damaged washers where applicable, or a wrong caliper only after the fault is confirmed.
- Choose professional brake inspection if the pedal remains soft, a warning light is present, the reservoir ran dry, or ABS bleeding may be required.
Conversion should follow the safety result. Do not push parts purchases as the answer when the symptom points to a no-drive condition or technician-level hydraulic diagnosis.
Inspection steps

- Park the vehicle securely and do not move it if the brake pedal is soft, sinking, low, or inconsistent.
- Check the reservoir and refill only with the OEM-specified brake fluid before the level drops low enough to draw air again.
- Inspect the caliper, hose, line connection, bleeder screw, and surrounding area for any sign of fluid leakage.
- Verify the bleeder screw is above the internal air pocket area, not facing downward or sideways in a way that traps air.
- Bleed using the OEM wheel sequence when available; do not assume one universal order fits every vehicle.
- Watch for bubbles through a clear hose and close the bleeder before pedal release during two-person manual bleeding.
- Recheck pedal feel with the engine off and then according to safe service information for the vehicle.
- Stop if warning lights remain, fluid level drops, leaks appear, or the pedal does not become firm.
| Method | Where it helps | Limit |
|---|---|---|
| Two-person manual bleeding | Simple caliper replacement when air is near the opened corner | Can pull air back in if timing or bleeder closure is poor |
| Pressure bleeding | Consistent fluid movement through the system | Requires correct adapter and careful reservoir control |
| Vacuum bleeding | Useful at the bleeder screw with simple tool access | May show misleading bubbles around bleeder threads |
| Gravity bleeding | Low-force way to start fluid movement | May be too slow or incomplete for trapped air or ABS circuits |
- Match side, mounting style, hose connection, bleeder location, and bracket requirements before installation.
- Avoid a caliper with a damaged bleeder screw, cracked casting, stripped threads, or signs of fluid leakage.
- Confirm the bleeder can sit at the top when mounted on the correct side of the vehicle.
- Inspect slide pins, boots, pad hardware, and piston condition before trusting the part.
- Use vehicle-filtered listings for calipers, brake hoses, pads, fluid, and bleeding tools instead of matching by appearance alone.
If the installed caliper cannot be bled because the bleeder is not positioned correctly, replacing more fluid will not solve the fault. Correct fitment and orientation must be fixed before the hydraulic system can be verified.
Replacement notes
If the line was open briefly, the reservoir stayed full, and only one corner was disturbed, the repaired corner may be the main bleed point. If the reservoir ran low, multiple lines were opened, fluid is old or contaminated, or ABS components may contain air, the procedure can expand beyond one wheel.
Some vehicles require an automated ABS bleed routine when air is trapped inside the hydraulic control unit. A soft pedal alone may not set a diagnostic trouble code, but ABS, brake, or stability-control warning lights should be scanned and diagnosed before assuming manual bleeding is enough.
Do not follow a universal wheel order, pump count, fluid volume, or time limit from a generic guide. Use vehicle service information for the final bleed sequence, ABS routine, and any required post-service checks.
FAQ
What order should I bleed brakes after replacing a caliper?
Follow the OEM bleeding order for the exact vehicle. Do not assume one universal farthest-wheel order because hydraulic circuit design and ABS layout vary.
Can a caliper be installed wrong and still bolt on?
Yes. A left and right caliper mix-up can place the bleeder screw below the trapped air pocket, which can keep the pedal soft even after repeated bleeding.
Can I drive with a soft pedal after bleeding brakes?
No. Do not drive if the pedal is soft, sinking, unusually low, or inconsistent, or if any brake fluid leak or brake warning light is present.
Why is the pedal still soft when no bubbles come out?
Possible causes include wrong caliper orientation, air trapped in the ABS hydraulic unit, hose expansion or damage, pad seating issues, a leak, or master cylinder bypass.
When should I call a mechanic?
Call for service if the reservoir ran dry, warning lights are on, the pedal sinks, leaks appear, the bleed result is uncertain, or the vehicle may need a scan-tool ABS bleed.


Comments
Be the first to add a practical repair note or follow-up question.