
Main causes

Cylinder 1 misfire under boost is a classic sign of secondary ignition weakness. When the turbocharger forces more air into the cylinder, combustion chamber pressure rises sharply. The ignition coil must generate enough voltage to jump the spark plug gap under this increased density. A coil with degrading insulation or winding issues may fire fine at idle and light throttle but fail to deliver a strong spark at high load, triggering the P0301 code.
Freeze frame data stored with the code typically shows high engine speed, high calculated load, and sometimes elevated fuel trims as the ECU adds fuel to compensate for a perceived lean condition from unburned fuel. In Mode $06 data, the misfire counter for cylinder 1 will increment exclusively during boost events.
Symptoms You May Notice
- Flashing check engine light during hard acceleration.
- Noticeable stumble, hesitation, or bucking when passing or merging.
- Mild vibration at highway speeds under load.
- No misfire at idle or during gentle cruising.
- Possible P0301 code alone, or in combination with random misfire codes P0300.
Key Freeze Frame PIDs to Review
| Parameter | Typical Boost Event Reading | What It Reveals |
| Engine RPM | Above 3,000 RPM | Loaded condition triggered misfire |
| Calculated Load | >70% | Cylinder pressure is high |
| Short Term Fuel Trim (Bank 1) | Positive spike | ECU compensates for unburned fuel |
| Misfire Count Cylinder 1 | Increment from 0 | Direct evidence of misfire under that frame |
Why not injectors first? A direct-injection EcoBoost injector is a high-precision component costing several hundred dollars each and requires specialized calibration when replaced. Most good shops report that an ignition coil is the root cause of a single-cylinder boost-only misfire more often than an injector. A coil swap test prevents expensive and unnecessary parts swapping.
Diagnostic order
A P0301 code on your Ford EcoBoost that only appears under hard acceleration or boost often points to a secondary ignition failure under high load. The most critical, low-cost, and safe first test you can perform is a cylinder 1 coil swap. This test immediately rules out or confirms the ignition coil as the culprit before you even consider touching the costly and dangerous high-pressure fuel injectors.
Warning: Before beginning any work, allow the engine to cool completely. High-pressure direct injection fuel systems retain dangerous pressure long after shutdown. Do not attempt to service any fuel system component. This guide focuses strictly on safe, secondary ignition diagnostics.
Following a structured diagnostic path prevents multi-thousand dollar injector misdiagnosis. A coil swap costs nothing but reveals the real failure point if present. This article walks you through the correct, safe procedure and interpretation.
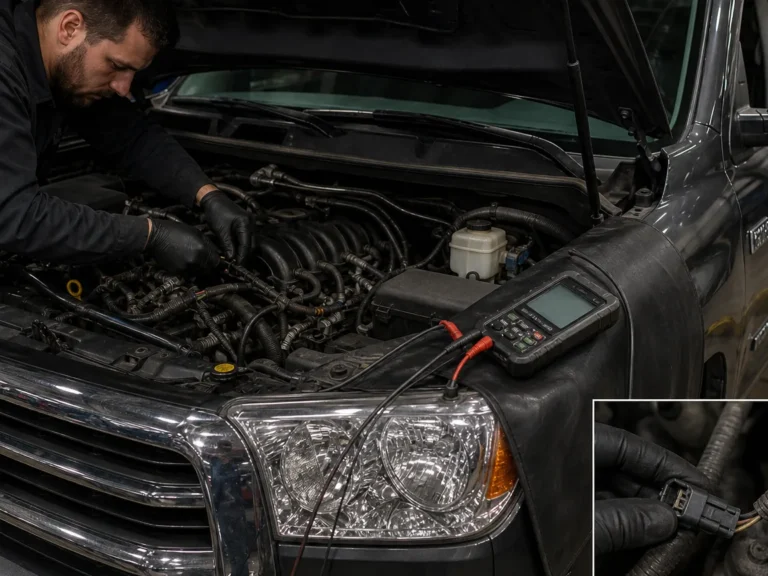
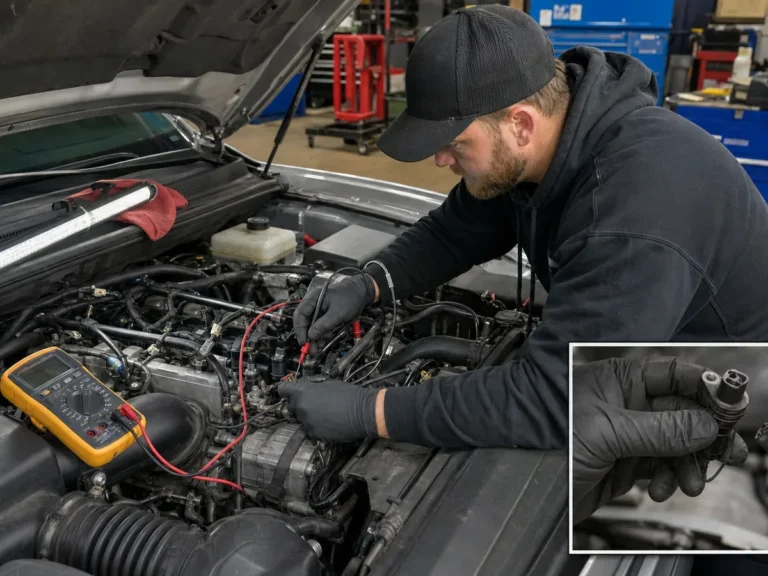
Performing a coil swap on a Ford EcoBoost engine requires only basic hand tools and a scan tool capable of reading live misfire data. High-pressure fuel systems demand strict safety precautions; no fuel system components will be disturbed.
- OBD‑II scan tool with live data and Mode $06 (generic ELM327 with smartphone app works, but dedicated tool preferred).
- Socket set – typically 8mm or 10mm socket for coil hold‑down bolt.
- Dielectric grease for coil boot sealing.
- Safety glasses to protect against any dirt or debris.
- Clean fender cover or work mat.
- Small mirror and flashlight to inspect plug well.
- Torque wrench (coil bolt specification is low; avoid overtightening).
Never attempt to open or service the high‑pressure fuel pump or fuel lines. Residual pressure can cause serious injury. This test interacts only with the ignition system.

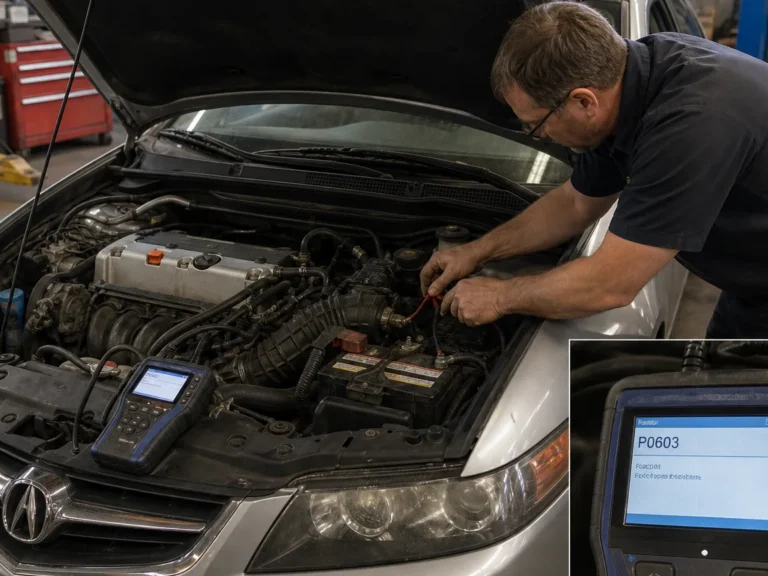
Before turning a wrench, connect a scan tool to verify the P0301 code and review stored freeze frame data. Record the exact conditions that set the code: engine RPM, load, vehicle speed, and coolant temperature.
- Plug in scan tool and read current and pending codes. Confirm P0301 is the only cylinder-specific misfire code.
- Navigate to live data and bring up misfire counters for cylinders 1-4 (or 1-6 on V6). Note any counts at idle.
- Access Mode $06 (On‑Board Monitoring Test Results). Locate the misfire monitor result for cylinder 1. The test ID varies by year; an incrementing raw count during the monitor cycle indicates a problem.
- Check short‑term fuel trim (STFT) for bank 1; a sudden increase when misfire occurs points to unburned fuel reaching the oxygen sensor.
- Verify that other cylinders show zero or very low misfire counts – this isolates the issue to cylinder 1.
If multiple cylinders misfire under boost, inspect turbocharger and charge air piping for boost leaks or a failed blow‑off valve before condemning coils. A single‑cylinder pattern is the focus here.

This procedure swaps the cylinder 1 coil with a known‑good cylinder (typically cylinder 2 or 3). The goal is to see if the misfire relocates.
- Ensure engine is cold. Disconnect negative battery cable (optional but reduces risk of accidental shorts).
- Remove engine appearance cover if equipped. Locate coil on cylinder 1 (usually closest to the accessory belt; confirm from firing order diagram).
- Clean the area around the coil to prevent debris from falling into the plug well.
- Disconnect the electrical connector by pressing the tab and pulling straight back.
- Remove the coil hold‑down bolt. Place it safely aside.
- Twist the coil boot slightly left‑right to break the seal, then pull upward firmly and evenly. Do not pry with metal tools.
- Inspect the coil boot for cracks, carbon tracking, or oil contamination. A clean, dry boot is a good sign; oil indicates a valve cover spark plug tube seal leak.
- Repeat the same steps for a donor cylinder (e.g., cylinder 2).
- Apply a pea‑sized dab of dielectric grease inside the connector boot of each coil before reinstalling.
- Install the donor coil into cylinder 1, and the original cylinder 1 coil into the donor cylinder. Push until fully seated; the boot should pop onto the spark plug.
- Reinstall hold‑down bolts and tighten to specification. Over‑tightening can crack the coil body.
- Reconnect electrical connectors securely. A distinct click ensures proper lock.
- Reconnect battery, start engine, and verify no immediate misfire codes appear at idle.
After the swap, you need to recreate the exact high‑load scenario that originally set the code without risking an accident or breaking traffic laws.
- Have an assistant hold the scan tool and monitor live misfire counters for all cylinders, or set up data logging.
- Find a safe stretch of road where you can accelerate without interruption.
- Bring the engine to normal operating temperature.
- At a moderate speed (around 30 mph in 3rd gear for automatic, or a similar eng < 3,000 RPM cruise), apply the throttle briskly to bring the engine into boost – 60–70% throttle input is sufficient for a short pull. Do not go wide‑open‑throttle on public roads; just enough to generate positive manifold pressure.
- Maintain acceleration for 3–5 seconds while the scan tool records misfire activity.
- Immediately release the throttle and coast down. Repeat the pull once more if needed to capture data.
- Park safely and review the misfire counters. Focus on the cylinder that now holds the original cylinder 1 coil.
If a test drive is not possible or a brake‑torque simulation is dangerous/unadvised on an automatic, use a dynamometer. Never remove or disable traction control for this test.
The coil swap test produces two clear paths based on whether the misfire followed the coil or remained on cylinder 1.
| Path | Observation | Diagnosis | Action |
| A – Misfire moved to donor cylinder | Post‑swap live data shows misfire counts now on the cylinder that received the original coil from cylinder 1 (e.g., now cylinder 2 misfires). | Faulty ignition coil confirmed. | Replace the failed coil with a quality OEM‑spec unit. Consider replacing all coils if age/mileage is high. |
| B – Misfire stayed on cylinder 1 | Misfire counts remain only on cylinder 1; donor cylinder clean. | Coil is likely functional. Problem lies deeper: spark plug, fuel injector, compression, or wiring to coil. | Proceed to inspect spark plug (if accessible) and check coil harness for damage. If those are normal, schedule professional injector/compression diagnosis. |
If the misfire moves but you still see occasional counts on cylinder 1, inspect the spark plug. A cracked insulator can cause random misfires regardless of coil.
When the coil swap fails to move the misfire, the coil is cleared. The focus shifts to the spark plug, cylinder compression, and the direct fuel injector. This is where the diagnostic path leaves the DIY realm due to the danger and complexity of the high‑pressure direct injection system.
Why Injector Replacement Is Not a DIY Task on EcoBoost
Ford EcoBoost direct injection operates at extremely high fuel pressures – enough to inject fluid beneath the skin. Injector replacement often requires special tools to remove carbon‑coked units, precise torque sequences, and reprogramming of the fuel injector calibration code into the ECU. Incorrect installation can lead to lean conditions, cylinder wash‑down, or catastrophic engine damage.
What a Professional Will Do
- Perform a relative compression test to rule out mechanical failure.
- Use a borescope to inspect intake valves for carbon buildup on direct‑injection engines.
- Perform an injector balance test (if supported) to compare flow rates.
- Check injector electrical circuit for intermittent continuity.
- Replace the injector only after all other causes are eliminated, and code the new injector properly.
Attempting to replace a high‑pressure injector yourself without the correct coding tool can result in a persistent check engine light, poor fuel economy, and potential engine damage. Do not shortcut this step.
If you have reached the point where a shop visit is necessary, provide the technician with thorough documentation. This checklist ensures you haven’t missed obvious external issues.
- Coil swap results: clearly indicate that misfire did not move, ruling out coil.
- Spark plug inspection (if you removed it): note brand, gap condition, any cracks, or heavy carbon.
- Visual check of the coil wiring harness: look for chafed insulation, broken clips, or oil contamination.
- Check for any oil inside the spark plug tube – it signals a leaking valve cover tube seal.
- Record the freeze frame data and any Mode $06 values to share with the technician.
- Verify that the fuel trim at idle is not excessively positive (possible vacuum leak).
- Provide a detailed account of when the misfire occurs: cold start vs. hot, steady throttle vs. boost transition.

Comments
Be the first to add a practical repair note or follow-up question.