
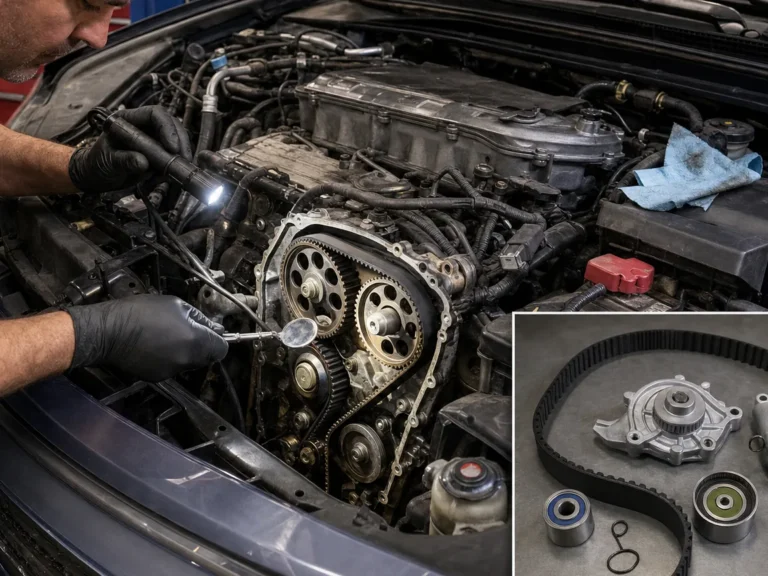
What this part does
The heater dial trim is not the heater core, blower motor, blend door, or temperature control mechanism. It is the visible trim piece around the manual heater control area. Depending on market and trim specification, it may share edges with side facias, radio surround pieces, switch blanks, knob openings, or the center panel structure.
Its practical job is to hold the dashboard finish cleanly around the controls while allowing the driver to reach the temperature, airflow, and fan controls. When it is removed, the technician may gain access to bulbs, dial knobs, clips, wiring connectors, switch blanks, or the front of the heater control assembly, but deeper HVAC components remain separate.
Because a public owner question for a 2004 Toyota Corolla Verso T2 non-climate-control car reports that climate-control advice does not match the manual-dial fascia, the exact non-climate-control layout should be verified before any detailed pull point or fastener claim is published.
Common failure signs
A loose fascia or missing clip points directly toward a trim-retention issue. A stuck heater dial, no backlighting, poor airflow selection, or a fan-speed fault may only require trim removal to inspect the control area, and the actual fault may sit behind the visible fascia.
- Loose heater dial trim can indicate broken clips, previous removal damage, missing fasteners, or a panel that was not seated evenly.
- A broken or spinning knob can indicate a damaged knob, shaft, or control assembly rather than a failed trim panel.
- A failed backlight can require access to a bulb or illumination circuit, but the correct bulb type and access method must be verified before removal.
- A heater control that will not change temperature or airflow can involve a cable, actuator, flap, blend door, or control head, not just the fascia.
- A rattle after prior dashboard work often points to a missing clip, trapped wiring, or trim edge not fully seated.
If the symptom is fan speed only working on some settings, the trim may be removed for access, but the usual diagnostic direction is the blower control circuit or resistor path, not the heater dial trim itself.
Before replacing it
A 2004 Toyota Corolla Verso can vary by market, trim level, steering position, radio surround, and manual versus climate-control HVAC layout. The safest first move is to identify the exact dashboard configuration in front of you instead of copying a procedure from a different center stack.
- Confirm the vehicle is the manual heater dial version, not the automatic climate-control version.
- Inspect the side facias and surrounding panels for signs of previous removal, cracked tabs, glue, missing screws, or mismatched clips.
- Check whether the trim is warm enough to flex normally; cold aged plastic is easier to crack.
- Look for screw covers, switch blanks, ashtray or storage-panel edges, and radio surround joints that may hide retaining points.
- Keep work away from airbag-adjacent trim and wiring unless the repair manual directs the procedure.
Battery guidance should be handled cautiously. If only exterior trim is being inspected, ignition off and key removed may be enough for some checks. If connectors are unplugged or wiring is exposed, verify the service information first because battery disconnection can create reset or security-code requirements on some vehicles.
This is a low-force trim task when the retaining points are understood. If the panel needs heavy leverage, something is still attached, misaligned, previously repaired, or brittle. Tool choice should support controlled release rather than stronger pulling.
| Plastic trim tools | Spread pressure and reduce visible marks on the fascia edge | Bare metal pry tools against the finish |
| Low-tack tape | Protects adjacent trim from tool contact | Thick tape that hides panel gaps or traps dirt |
| Small flashlight | Helps spot hidden fasteners, tabs, and connector locks | Working by feel when one side will not move |
| Magnetic tray or container | Keeps screws, clips, and bulbs organized if removed | Leaving small parts on seats or floor mats |
| Replacement trim clips if confirmed | Prevents refitting a loose panel with broken retainers | Buying clips before identifying the correct style |
- A small screwdriver may be useful only for confirmed screw heads or connector locks, not for levering visible trim surfaces.
- Use a cloth or tape barrier if a service procedure requires contact near a finished edge.
- Keep phone photos of each stage so wire routing, switch positions, and clip orientation can be checked during reassembly.
The best replacement decision starts with inspection. If the fascia is intact and only one edge resists, replacement may be unnecessary. If clips are already broken, the panel is cracked, or the finish is damaged, replacement may be sensible after the correct trim version is confirmed.
- Identify whether the visible problem is cosmetic, mechanical, electrical, or HVAC-control related.
- Check for missing or cracked clips around any edges already exposed by side facia removal.
- Look for evidence of glue, tape, mismatched screws, aftermarket wiring, or a previous radio or accessory installation.
- Confirm whether the knob, bulb, switch blank, or control head is the part that actually needs attention.
- Only price or order trim after verifying the manual-dial fascia shape, color, market version, and mounting details.
A replacement fascia will not correct a heater that fails to change temperature, an airflow door that does not move, or a fan circuit fault unless the trim itself was physically stopping control movement.
Inspection steps
The main search intent is practical access: how to remove the manual heater dial fascia without cracking the panel. The secondary intent is diagnostic: owners may be chasing a stuck dial, failed illumination, loose trim, or a control-panel access issue.
| Symptom intent | Loose trim, broken dial, stuck knob, failed backlight, rattle, or access needed | Use the symptom to decide what to inspect after the fascia is released |
| DTC intent | Low relevance for trim removal because dashboard fascia is not an OBD fault by itself | If HVAC or blend-door codes exist, diagnose them separately with proper scan data and service information |
| Technical intent | Access the heater dial trim while protecting clips, connectors, knobs, and nearby panels | Follow a cautious sequence and stop when resistance does not match a normal clip release |
| Editorial intent | Explain safe scope without pretending to have an OEM-confirmed fastener map for every market | Tell readers what requires repair manual verification before publication or repair |
Visible content and structured data should match: this page can be marked as an Article or BlogPosting with breadcrumbs, while FAQ markup should only be used if the same questions and answers remain visible on the page.
Use this as a high-level inspection sequence, not a substitute for Toyota repair information. The goal is to confirm what is holding the fascia before applying release pressure.
- Photograph the current panel gaps, knob positions, and any side facias already removed.
- Switch the ignition off, remove the key, and keep controls in a known neutral position where practical.
- Inspect visible edges with a light for screw heads, covers, hooks, clips, or marks from prior removal.
- Check whether knobs or adjacent trim pieces are meant to be removed before the fascia, but do not pull them unless confirmed by service information or clear design evidence.
- Protect the surrounding finish with tape where a plastic trim tool will touch.
- Apply light pressure at a confirmed trim edge and watch whether the panel moves evenly or only flexes.
- If one area will not move, stop and re-check for hidden fasteners, wiring, prior adhesive, or a retained neighboring panel.
- After release, support the fascia before unplugging any connector or moving any cable.
If the trim only bends and does not release, that is not confirmation to pry harder. It is a diagnostic sign that the retention path has not been identified.

When a trim panel resists, the panel is telling you something. Old plastic can feel stubborn, but a single locked corner often points to retention that has not been found, not a need for stronger tools.
- Hidden fastener or cover: the most important possibility because forcing against a screw or retained bracket can crack the fascia.
- Adjacent trim dependency: some center panels release in a sequence, so a side piece, radio surround, storage panel, or switch blank may affect access.
- Knob or control interface retention: manual heater dials can create confusion if a knob, shaft, or bezel appears to be part of the fascia.
- Aged or brittle clips: older clips may hold unevenly, snap, or stay in the dash while the panel moves.
- Previous repair or accessory wiring: glue, tape, aftermarket audio wiring, or missing original clips can change normal release behavior.
- Connector or cable tension: wiring or HVAC control cables can limit movement once the panel starts to come free.
The cause ranking is practical, not a confirmed Toyota fastener map. Exact clip positions, screw counts, and connector locks need OEM or trusted repair-data confirmation for the specific market version.

Owner-safe checks should not require force, probing wiring, or working around safety-system components. They are meant to decide whether the fascia is a reasonable DIY access job or whether a technician should identify the retention points first.
- Confirm the vehicle has manual heater dials and not the climate-control panel shown in many online examples.
- Move each heater control gently and note whether the fault is dial stiffness, knob looseness, failed illumination, or panel movement.
- Look for cracks around the fascia corners, missing side facia clips, mismatched fasteners, or signs that the panel was already forced.
- Check whether the problem appears after a radio, bulb, switch, or accessory installation.
- Search for a repair manual image or trusted workshop procedure for the exact dashboard layout before removing knobs or adjacent panels.
- Stop if any trim edge is sharp, already split, glued, or flexing heavily.
If the only reason for removal is a dark heater-control backlight, verify that the lighting fault is local to the HVAC panel. Other dashboard lighting faults may need electrical diagnosis before trim removal becomes the next step.

Professional inspection is the smarter route when the fascia resists normal light release, the vehicle has modified wiring, or the complaint is an HVAC function fault rather than a trim access concern. The value is not just labor; it is knowing when not to pry.
- Compare the actual center stack with OEM repair information for the correct market and manual HVAC specification.
- Check whether any adjacent panel, radio surround, storage pocket, switch blank, or side facia must be removed first.
- Inspect for non-original wiring, alarm accessories, audio harnesses, glued repairs, or missing factory clips.
- Verify whether a heater control cable, connector, bulb holder, or switch harness is likely to be disturbed during fascia movement.
- If a heater function complaint is present, test control operation before and after trim access so the fascia is not blamed for an unrelated HVAC fault.
Technician-level work should handle connector locks and cable attachments by service procedure. Guessing at a cable clip or wiring lock can create a new fault even when the trim panel itself survives.
Think of the job as a diagnostic path rather than a single pull. Each step should either confirm that the fascia is free to move or reveal why it is not. If a step produces unexpected resistance, the correct action is to pause and inspect.
- Inspect the visible layout, prior repair marks, and symptom.
- Confirm the procedure against OEM or trusted repair information for the exact manual HVAC panel.
- Remove or loosen only the adjacent parts that are confirmed as part of the access sequence.
- Protect the trim edge and begin release with plastic tools at a confirmed panel edge.
- Work gradually so clips release in sequence instead of twisting the fascia.
- Support the panel as soon as it moves enough to expose wiring, bulbs, or cables.
- Disconnect only confirmed connectors or holders, using their locks rather than pulling on wires.
- Inspect clips, bulbs, knobs, and control movement while the fascia is off.
- Reinstall with aligned clips and verify function before final pressure is applied.
This flow deliberately avoids exact screw counts and clip positions because those details are configuration-specific and must be checked against repair information before publication or repair.
The practical aim is to remove the heater dial fascia without loading one clip or corner more than the rest of the panel. The sequence below is intentionally high level because exact release points must be verified for the vehicle configuration.
- Prepare the vehicle: park securely, switch the ignition off, remove the key, clear the work area, and protect surrounding trim surfaces.
- Check visible fasteners: use a light around side facia openings, storage panels, switch blanks, and panel seams before applying pressure.
- Confirm knob and adjacent-trim requirements: remove knobs or neighboring pieces only if the service information or visible design confirms they are part of the access sequence.
- Begin clip release: use plastic trim tools with light, even pressure and keep the fascia square to the opening.
- Move around the panel gradually: if one area releases, do not use it as a hinge against the still-retained side.
- Support the fascia: once there is movement, hold the panel so wiring, bulb holders, or cables are not carrying its weight.
- Handle connectors carefully: release locks and holders by their designed tabs, not by pulling on wires or twisting control cables.
- Inspect before repair: identify broken clips, failed bulbs, damaged knobs, loose holders, or control-head issues before ordering parts.
If the trim resists removal with light, even pressure, have the panel inspected before damage spreads to the center stack or heater-control assembly.
The fascia may be old, brittle, or previously disturbed. That does not mean it needs more force. It means the safe margin is smaller and the release path needs to be identified more carefully.
- Do not pry against visible finished trim with an unprotected metal screwdriver.
- Do not pull hard from one corner while another edge is still locked.
- Do not twist the fascia as a lever once one clip releases.
- Do not remove knobs by force unless their removal is confirmed for the exact control design.
- Do not let the fascia hang by bulb wiring, switch wiring, or HVAC control cables.
- Do not assume that climate-control removal instructions apply to the non-climate-control manual dial version.
- Do not continue if airbag-adjacent trim, unknown wiring, or aftermarket harnesses become involved.
Cold plastic and previous repairs are a poor combination. If the vehicle has been sitting in cold conditions, give the cabin time to normalize before any trim-release attempt, without applying direct heat that could warp the fascia.
Used interior trim often looks correct from the front while hiding broken tabs on the rear. For a 2004 Corolla Verso, also confirm the part is from a matching manual heater dial configuration rather than the climate-control fascia.
- Ask for rear-side photos that show every clip tower, screw boss, tab, and repaired area.
- Compare manual dial openings, switch blanks, storage or radio surround edges, and trim finish against the vehicle.
- Check left-hand-drive and right-hand-drive compatibility where the panel layout or surrounding trim may differ.
- Avoid parts with glue repairs around retention points unless no better option exists and the repair is fully visible.
- Confirm whether knobs, bulb holders, switch blanks, or clips are included or must be transferred from the original panel.
- Do not buy by year and model alone when the seller cannot confirm manual versus climate-control HVAC trim.
A used part with intact front finish but missing rear clips may still rattle or sit proud after installation. Rear mounting condition is part of the fit, not a cosmetic extra.
Before pressing the fascia fully home, align all clips, wiring, holders, and adjacent trim edges. The panel should seat with controlled pressure, not impact or bending. If one edge sits proud, remove and inspect rather than striking the trim.
- Reconnect any confirmed connector, bulb holder, or switch plug and make sure its lock is seated.
- Check that wiring and cables are routed clear of clip paths and control movement.
- Set the fascia squarely against the opening and press near supported areas so clips engage evenly.
- Move each heater dial through its normal range and confirm it does not bind against the trim.
- Switch on lighting only when safe and appropriate, then confirm the HVAC control illumination works if that was part of the repair.
- Run the fan and control selections as applicable to confirm the panel installation did not create a new issue.
- Drive or lightly tap around the panel area after reassembly to listen for rattles from loose clips or trapped parts.
If the panel sits unevenly after careful reinstallation, the likely causes are a misplaced clip, trapped wire, broken retaining point, mismatched replacement trim, or an adjacent panel that was not seated in the correct order.
The practical stop point is resistance that does not behave like a normal trim clip. Continuing past that point can turn a small access job into a cracked center stack, damaged control head, or wiring fault.
- Stop if one side flexes heavily while the other side remains locked.
- Stop if you find aftermarket wiring, taped repairs, glued trim, or missing factory fasteners.
- Stop if a connector, cable, or bulb holder cannot be identified clearly before removal.
- Stop if the complaint is heater temperature, airflow, or fan operation and you have not diagnosed the HVAC system separately.
- Stop if airbag-adjacent trim or major dashboard components appear to be part of the access path.
- Stop if replacement parts are unavailable and the existing trim is already cracked.
If the panel does not release with light, even pressure, use an internal repair quote or trim-support path before damage spreads. The smarter repair is often one verified release sequence, not another attempt with a stronger tool.
The 2004 Toyota Corolla Verso heater dial trim can usually be removed without taking apart the whole center stack when the correct manual-HVAC layout is confirmed, hidden fasteners are checked, plastic trim tools are used, clips are released gradually, and wiring or control cables are supported. Stop if the fascia needs force, because brittle clips, prior repairs, or a hidden retaining point can cause avoidable damage.
- Best first action: inspect the exact manual-dial panel and verify the OEM sequence.
- Main risk: broken clips, marked trim, strained wiring, or disturbed heater-control cables.
- Not a DTC repair: HVAC codes or blend-door faults need separate diagnosis.
- DIY limit: light trim release only; resistance, modified wiring, or unknown fasteners justify technician inspection.
Replacement notes
Once the fascia is off, inspect before ordering. A loose panel may need clips, not a full fascia. A dark heater-control area may need a bulb or circuit check. A stiff control may need cable or control-head diagnosis. A cracked fascia may justify replacement only after the correct version is matched.
- Replace broken clips with the correct style rather than forcing old clips back into place.
- Check bulb holders and illumination paths only after confirming the lighting complaint is local to the HVAC panel.
- Inspect knobs for cracks, rounded internal shapes, or poor engagement before blaming the control assembly.
- If a connector was unplugged, check that its lock still holds and that wiring was not strained during removal.
- If the panel finish is damaged, confirm color, texture, switch openings, and manual-HVAC compatibility before buying replacement trim.
Related APW content should route owners to heater control bulb replacement, trim clip identification, and HVAC diagnosis pages where the actual fault points beyond the fascia.
FAQ
Can I remove the 2004 Toyota Corolla Verso heater dial trim without removing the whole center stack?
Usually, the heater dial trim can be removed without disturbing the whole center stack if the correct manual-HVAC release sequence is confirmed. Do not assume this if hidden fasteners, adjacent trim dependency, or prior repairs are present.
Do I need to disconnect the battery before removing the heater dial trim?
Check the owner manual or service information first. If you will unplug connectors or expose wiring, battery guidance matters, but disconnection can also involve radio, security, or initialization concerns on some vehicles.
Can I use a metal screwdriver to pry the fascia off?
Avoid using a bare metal screwdriver against visible trim. A plastic trim tool spreads pressure and is less likely to mark the fascia. Use a screwdriver only for confirmed screws or connector locks.
Will removing the heater dial trim fix a heater that will not change temperature?
Not by itself. Trim removal may provide access, but a temperature-control fault can involve a cable, control head, blend door, actuator, or HVAC case issue that needs separate diagnosis.
Are OBD trouble codes involved in this trim removal job?
Usually no. Heater dial trim removal is a mechanical interior trim task. If HVAC or body-control codes are present, diagnose those separately rather than treating the fascia as the cause.
Is a used heater dial fascia safe to buy?
A used fascia can work if it matches the manual heater dial layout, market version, trim finish, switch openings, and rear mounting points. Ask for rear photos because broken clips are often hidden from front-view listings.


Comments
Be the first to add a practical repair note or follow-up question.