
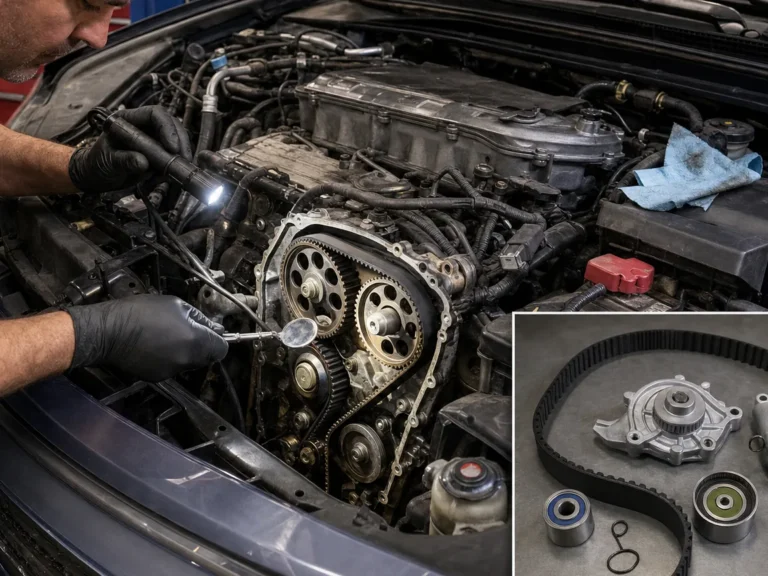
What this part does
The manual heater dial fascia is a trim and control surround, not just a cosmetic cover. It holds or frames the heater knobs, panel illumination area, switches, and the access path to the control unit behind it. On manual HVAC versions, the dials may operate cables or switches behind the panel, so the fascia can feel stuck even after the visible side trims are off.
- Use this procedure only for a non-climate-control Corolla Verso with round manual heater dials.
- Do not transfer the procedure directly from an automatic climate-control panel because the panel shape, attachments, and electrical layout can differ.
- Before publishing a precise version, confirm the Corolla Verso generation, model year, market, and right-hand-drive or left-hand-drive layout.
- The source question identifies a 2004 Corolla Verso T2 1.8 petrol in the UK, with side fascias already removed.
Toyota Corolla Verso R1 accessory installation material shows a manual air-conditioning case where the control knob and heater control panel are removed after side louver trim access, but the official repair sequence should still be checked for the exact VIN.
Function checks protect against the two most common reassembly errors: a cable that is not seated correctly and a connector that was left loose. Check operation before assuming a replacement part is defective, especially if the controls worked before the fascia was removed.
- Turn the temperature dial through its full range and feel for smooth, consistent resistance.
- Move the airflow direction control through all positions and confirm the selected vents respond.
- Check fan speed settings and listen for normal blower operation.
- Test A/C, recirculation, rear demist, or related switches if they were unplugged or disturbed.
- Switch the lights on and confirm heater control illumination if the panel bulbs were serviced.
- Confirm the center fascia sits flush and does not rattle over light dashboard taps.
If a dial now stops early, springs back, or feels heavier than before, reopen the panel and inspect cable seating before driving in poor visibility.
Common failure signs
The fascia itself usually fails through age, previous removal, broken clips, or stress around the heater knobs. The controls behind it may also need access for illumination, switch, cable, or radio-area work. The important split is whether the problem is trim-only or whether the heater controls no longer operate correctly.
- The heater control illumination is out or intermittent.
- A heater knob feels loose, stiff, or no longer reaches its full travel.
- The fascia rattles after a previous stereo or trim repair.
- The panel edge sits proud, suggesting a broken clip or trapped harness.
- The owner needs access for radio, center console, or switch work.
- Cosmetic damage makes replacement of the fascia or knob surround necessary.
If the heater dial movement is stiff before removal, do not assume the fascia is the cause. Manual heater systems can use cables, levers, and doors behind the dashboard, and a forced knob can damage a cable end or control head.
Before replacing it
Use tools that reduce marks before they increase force. A plastic trim lever spreads load across the fascia edge, while masking tape protects the surrounding finish from small slips. Toyota repair information for related heater-control work also supports taping a screwdriver tip when a screwdriver is used near a cable clamp, which is a useful caution around this panel.
- Plastic trim removal tools for releasing fascia edges and adjacent trim.
- Masking tape for the shaded or contact areas around the heater panel and side trims.
- A flashlight or inspection light to find hidden screws, clips, connectors, and cable routes.
- A small container or magnetic tray to keep screws and clips in removal order.
- A screwdriver or bit driver matched to the actual fasteners you can see; do not force an unmatched tip.
- Optional thin gloves for grip and cut protection, especially on sharp trim edges behind the panel.
Do not use a bare metal screwdriver as the main pry tool on visible dashboard trim. If a screwdriver is needed for a clamp or fastener, protect the tip and work only where the tool is supported.
Ignition off and key removed is the baseline before touching the fascia. If you expect to disconnect electrical connectors, check the owner manual and battery-disconnection guidance first, because radio memory, security behavior, and module wake-up behavior can vary. The safer habit is to avoid energized probing or connector work unless you know what the circuit is.
- Keep the ignition off and remove the key before trim removal.
- Use plastic tools near visible trim to reduce scratches and edge dents.
- If disconnecting the battery, follow the vehicle manual and allow for radio or security reset requirements.
- Avoid airbag-adjacent panels unless OEM repair information confirms the correct removal path.
- Keep screws, clips, and knobs organized so reassembly does not create rattles or missing retainers.
If the reason for removal is failed demist control, stuck airflow direction, or blower switch trouble, restore safe screen clearing before normal driving.

When the fascia stays stuck, pause and classify the resistance. A springy edge movement can be a clip still gripping. A solid stop often means a fastener, bracket, cable, or overlapping trim is still present. A sticky feel may come from old adhesive, spilled residue, or a previous repair.
- Check the panel perimeter with a flashlight before inserting a tool deeper.
- Look behind any removed side fascia for screws that face sideways or upward.
- Pull heater knobs only if the model-specific procedure confirms they must come off.
- Watch for non-factory stereo wiring or repair tape behind the center stack.
- Stop if the panel edge turns white, creaks sharply, or begins to split.
Inspection steps

A controlled inspection sequence is safer than starting at the tightest corner. Work from confirmed access points, then move toward the resistance. If one side releases and the other side stays fixed, the fixed side is telling you where to inspect next.
- Compare the panel to the manual heater dial layout and confirm the vehicle trim level.
- Apply masking tape to the surrounding dash and louver edges before using trim tools.
- Check the areas exposed after removing side fascias or louvers.
- Remove only visible fasteners that clearly retain the heater control panel or fascia.
- Use light pressure at the edge and listen for normal clip release rather than cracking.
- Stop as soon as a gap opens and inspect behind the fascia for connectors or cables.
The unresolved owner problem is often that the visible side trim has been removed but the center fascia still behaves as if it is locked. That usually happens because the final retainer is not visible from the front, because a knob or adjacent panel still overlaps the fascia, or because previous work changed the factory layout.
- A hidden screw or retaining tab is still engaged behind a removed side trim.
- A manual heater knob or control face is still holding the panel in place.
- A clip is tight from age, temperature cycling, or slight dashboard distortion.
- Aftermarket stereo wiring, adhesive pads, or repair tape are binding the rear of the panel.
- A connector or cable behind the panel is limiting forward movement.
- A broken clip has twisted and jammed instead of releasing cleanly.
Do not chase the problem by levering harder at the most visible corner. Move the inspection point toward the retained edge and identify the exact hold point.

This ranking is practical rather than absolute because the exact vehicle history matters. A clean, untouched dashboard usually fights at clips and fasteners. A car with prior stereo, bulb, or trim work may have missing screws, adhesive, routed wires, or broken clip fragments changing the removal feel.
| 1 | Hidden screw or retained trim overlap | Panel has a solid stop at one edge and does not flex evenly. | Inspect exposed side areas, knob openings, and adjacent trim before pulling again. |
| 2 | Tight retaining clips | Panel moves slightly, then releases in small steps with even plastic-tool pressure. | Work evenly around the edge and support the surrounding trim. |
| 3 | Attached connector or manual control cable | Panel starts forward but will not move far from the dash. | Open a small inspection gap and identify wiring or cable routing before disconnecting. |
| 4 | Previous adhesive, repair, or aftermarket wiring | Resistance feels sticky, uneven, or different from one side to the other. | Look for non-factory tape, repair tabs, stereo harnesses, and trapped wiring. |
| 5 | Cracked fascia or jammed broken clip | Panel creaks, edge turns white, or one corner lifts while another twists. | Stop and plan clip extraction or replacement rather than forcing the fascia. |
Professional testing is the smarter next step when the removal reason is electrical, when a control cable is stiff, or when the fascia has already been disturbed by previous repairs. The fascia may be only the access point; the actual issue can be a bulb, switch contact, connector, cable clamp, or control head.
- Check connectors for bent terminals, poor latch engagement, and trapped harness routing.
- Verify manual control cables are not kinked, pulled out of their clamps, or bent at the wire.
- Operate each heater dial through its full travel and confirm it reaches both end positions smoothly.
- Check heater panel illumination only with a proper circuit method and confirmed wiring information.
- Inspect switch bodies, bulb holders, and printed contact areas if the panel was removed for lighting or control failure.
Related Toyota heater-control repair information warns that bent cable wires can worsen control operation, so cable handling should be slow and deliberate.
A professional trim or HVAC-control inspection is sensible when the vehicle has brittle trim, unknown previous repairs, or cable-operated controls that do not match the procedure you are following. The cost of guessing is usually a broken fascia, a distorted cable, or a new electrical problem.
- Stop if the fascia edge turns pale, cracks, or makes a sharp snapping sound.
- Stop if one area remains fixed after confirmed screws and clips have been released.
- Stop if you see non-factory wiring, loose connectors, or taped harness repairs.
- Stop if a cable clamp is visible but the release method is not clear.
- Stop if the next panel to remove is near an airbag area and you do not have OEM instructions.
Use the open panel to solve the actual issue rather than replacing parts blindly. A dark heater panel may need bulb or connector checks. A loose fascia may need clips. A stiff dial may need cable inspection. A radio-access job may need the center console sequence rather than extra force on the heater panel.
- For failed heater illumination, inspect bulb access, bulb holders, connector seating, and visible wiring before buying a panel.
- For stuck heater knobs, inspect the control cable and dial mechanism before blaming the fascia.
- For a rattling panel, inspect missing clips, broken tabs, and fastener order.
- For radio access, follow the Corolla Verso center stack removal path so overlapping trim is not damaged.
- For a cracked fascia, compare part markings and trim finish before ordering a replacement.
Do not buy a fascia only because it is listed for Corolla Verso. Manual heater controls, automatic climate panels, trim colors, radio surrounds, and market layouts can differ. A seller photo should show the rear tabs and screw bosses as clearly as the front face.
- Match manual heater dial openings, switch positions, and trim finish to your original fascia.
- Check rear mounting tabs, clip slots, and screw bosses for cracks or previous glue repairs.
- Confirm right-hand-drive or left-hand-drive panel compatibility where the center stack differs.
- Avoid parts with missing knobs unless your original knobs are confirmed reusable.
- Ask for part markings or donor vehicle details before ordering a used fascia.
The heater dials fascia on a non-climate-control Toyota Corolla Verso is usually removed by protecting the surrounding trim, removing required side or adjacent trim, taking out confirmed visible fasteners, releasing the retaining clips, and easing the fascia forward. Stop if it resists after the fasteners are out, because hidden screws, tight clips, wiring, or manual heater-control cables may still be attached.
Replacement notes
Toyota Corolla Verso R1 accessory disassembly notes support removing side louver trim before the heater control panel and show that the manual air-conditioning version involves the control knob, heater control panel, screws, and clips. Use that as a cautious direction, not as a substitute for VIN-specific repair information.
Protect the Surrounding Trim
Mask the edges around the heater control fascia, side louvers, radio surround, and lower center trim where a tool may contact the surface. Protective tape matters because the visible silver or dark trim can mark before a clip releases.
Remove Any Surrounding Trim Pieces Required for Access
Remove the side fascias or louvers only in the sequence confirmed for the vehicle. If the side pieces are already removed, inspect the exposed edges for screws, hooks, clips, or overlap that still locks the heater fascia in place.
Remove Visible Fasteners
Remove only fasteners you can positively identify as retaining the heater control panel or fascia. Some accessory instructions for Corolla Verso R1 RHD show screws and clips at this stage, but a precise count should be verified against the exact model year and market before publication.
Release the Retaining Clips Carefully
Use a plastic trim tool near the retained edge and apply even pressure. Work across the panel rather than levering one corner far away from the dash. A normal clip release feels progressive; a sudden hard stop means you should recheck for another fixing point.
Ease the Fascia Forward and Check for Connectors or Cables
Once the panel moves, bring it forward only enough to see behind it. Check for switch connectors, illumination wiring, and any manual heater control cables before disconnecting anything. If cable clamps are present, do not bend the cable wire or let the outer cable pull out of its seat.
Before pushing the fascia home, compare every clip and tab with the dashboard openings. Replace broken clips where possible and remove loose fragments from the dash cavity. If the fascia was removed for bulb or switch work, confirm that the repair is complete before closing the panel.
- Reconnect any electrical connector that was disconnected and confirm the latch engages.
- Seat any manual control cable or outer cable clamp exactly as it was before removal.
- Route wiring so it cannot be pinched between the fascia and dashboard frame.
- Align the fascia with the panel opening before pressing clips home.
- Install confirmed screws or fasteners without cross-threading or over-tightening into plastic.
- Refit side trims, louvers, knobs, and lower trim only after the main panel sits flush.
If a clip no longer holds, do not pack the gap with adhesive as a first repair. Identify the missing or cracked retainer and use the correct trim clip or fascia repair method.
FAQ
Can I just pull the Corolla Verso heater fascia off after removing the side trims?
No. Side trim removal may expose the access path, but the heater fascia can still be held by screws, clips, a knob, wiring, or manual control cables. Inspect the retained edge before pulling harder.
Do I need to disconnect the battery before removing the fascia?
For simple visual trim inspection, ignition off and key removed is the starting point. If connectors will be unplugged or electrical testing is planned, follow the owner manual and battery-disconnection safety guidance for the vehicle.
Why does the fascia move forward but not come away?
That usually means a connector, cable, or remaining retainer is limiting movement. Open only a small gap, look behind the panel, and identify the attachment before disconnecting anything.
Can a broken heater control light be fixed without replacing the fascia?
Often, yes. The fault may be a bulb, bulb holder, connector, or illumination circuit rather than the fascia itself. Inspect the panel and test the lighting path before buying trim.
What should I check after reinstalling the heater fascia?
Check temperature control, airflow direction, fan speeds, A/C or recirculation switches if fitted, panel illumination, demist function, and fascia fit. Reopen the panel if a dial binds or stops early.

Comments
Be the first to add a practical repair note or follow-up question.