
What this part does

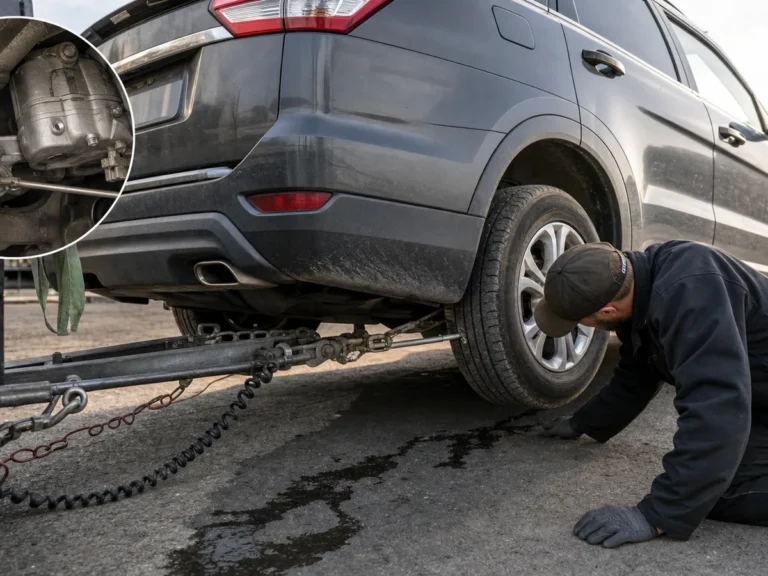
The rear body structure of a RAV4 manages impact loads, supports the liftgate opening, locates rear exterior panels, carries rear bumper reinforcement loads, and helps keep sensors and closures aligned. In a rear impact, the bumper cover may return close to its original shape while the absorber, reinforcement, rear body panel, rail ends, cargo floor, or brackets behind it carry the actual collision force.
Structural measurement is not a visual guess. It is a comparison of key body reference points against current OEM repair information using computerized, fixture-based, or otherwise calibrated measuring equipment. That matters because liftgate fit, water sealing, suspension alignment, and driver-assistance sensor accuracy can depend on body points being where the repair procedure expects them to be.
The bumper system and rear structure also have different jobs. The cover is mainly the visible exterior skin, the absorber and reinforcement manage a portion of impact energy, and the rear body structure behind them locates the vehicle's closures and mounting points. A repair that restores the outer cover without confirming the load path behind it can leave the owner with repeated fit problems, sealing problems, electronic faults, or alignment concerns that should have been addressed earlier in the repair plan.
Common failure signs
Common failure signs after a rear-end hit are usually about alignment, sealing, noise, warning lights, or tracking rather than one obvious broken part. A RAV4 can look mostly repaired from the outside while the rear opening, brackets, or floor structure still need verification.
| Sign | What it may point to | Next check |
|---|---|---|
| Uneven liftgate or rear panel gaps | Liftgate opening, hinge, latch, rear body panel, or quarter structure movement | Compare gaps, inspect closure operation, and verify body points when indicated |
| Water in the cargo area | Sealing surface distortion, weatherstrip contact issue, rear body panel damage, or repair fit problem | Inspect the leak path, closure fit, and rear opening alignment |
| Rear tire rub or changed tracking | Suspension component damage, mounting area movement, or alignment-related impact damage | Stop driving if rubbing is active and have suspension and body mounting points inspected |
| Warning lights or ADAS alerts | Sensor, wiring, module, mounting, or calibration issue after impact | Run a scan and inspect the affected sensor and harness areas |
| New rear rattle, exhaust contact, or loose bumper feel | Loose reinforcement, broken brackets, displaced exhaust, damaged mounts, or hidden absorber damage | Do not drive if parts are loose or contacting moving or hot components |
Do not use a reset warning light or a temporarily quiet rattle as proof that the structure is correct. Warning lights, body gaps, and noise complaints should be tied back to inspection findings, scan data, teardown photos, and measurement results.
Before replacing it

Before replacing bumper, liftgate, quarter, sensor, or suspension parts, confirm whether the mounting structure is still in the correct position. Replacing visible parts too early can waste time if the new part will only attach to a shifted rail end, rear body panel, bracket, or closure opening.
The practical sequence is to prove the attachment points before judging the part fit. A new bumper cover can look wrong because the cover is incorrect, but it can also look wrong because the reinforcement, bracket, rear body panel, quarter edge, or liftgate opening is no longer where it should be. The same logic applies to lamps, rear sensors, camera-related parts, and trim: a replacement component cannot correct a distorted mounting surface by itself.
Do not ask an owner to remove safety-related components, pull panels, straighten brackets, crawl under an unstable vehicle, or clear crash-related codes as a test. Those actions can hide evidence, create safety risk, or complicate repair documentation.
Inspection steps
Structural measurements are needed when panel gaps, door alignment, or body points suggest hidden frame or unibody movement on a rear-ended 2025 Toyota RAV4. The first check is whether the impact affected the unibody, liftgate opening, rear rails, floor pan, quarter structure, suspension mounting points, or sensor mounting areas, because visible bumper damage alone cannot confirm or rule out structural movement. Treat the issue as investigate soon, and stop driving until inspected if warning lights, tire rub, fuel smell, exhaust contact, severe impact damage, or a liftgate that will not close securely is present.
The strongest triggers are a misaligned liftgate, uneven rear gaps, a buckled spare tire or cargo floor area where applicable, rear rail or rear body panel deformation, quarter panel distortion, rear suspension alignment concerns, ADAS or sensor faults, water intrusion, and damage found after bumper cover removal. These signs matter because the RAV4 is a unibody vehicle: the body structure locates closures, bumper supports, panels, suspension references, and sensor mounting areas as one connected shell.
Owner-facing signs
- Liftgate binds, needs extra force, sits high on one side, or does not latch securely.
- Rear panel gaps, tail lamp fit, bumper edges, or quarter panel lines look uneven side to side.
- Water appears in the cargo area after rain or washing.
- A rear tire rubs, a new rear noise appears, or the vehicle tracks differently than it did before the impact.
- Warning lights or driver-assistance alerts appear after the collision.
Technician-facing triggers
- Bumper cover removal reveals absorber crush, reinforcement shift, rail-end movement, or rear body panel damage.
- The cargo floor, spare tire well area where applicable, quarter structure, or liftgate opening shows deformation.
- Sensor brackets, rear wiring, camera or parking-assist components, blind spot areas, or calibration-sensitive mounts are damaged.
- Rear suspension alignment, mounting points, tire position, or tracking behavior raises concern after the hit.
The correct diagnostic order moves from safety and documentation to scan, teardown, measurement, repair planning, repair verification, calibration checks, and final quality control. Skipping straight to a bumper cover replacement can miss the reason panels do not fit or warning lights remain after the repair.
- Perform a safety screen before driving or moving the vehicle. Stop if there is fuel smell, exhaust contact, tire rub, a loose reinforcement, a compromised liftgate latch, severe impact damage, or suspected suspension damage.
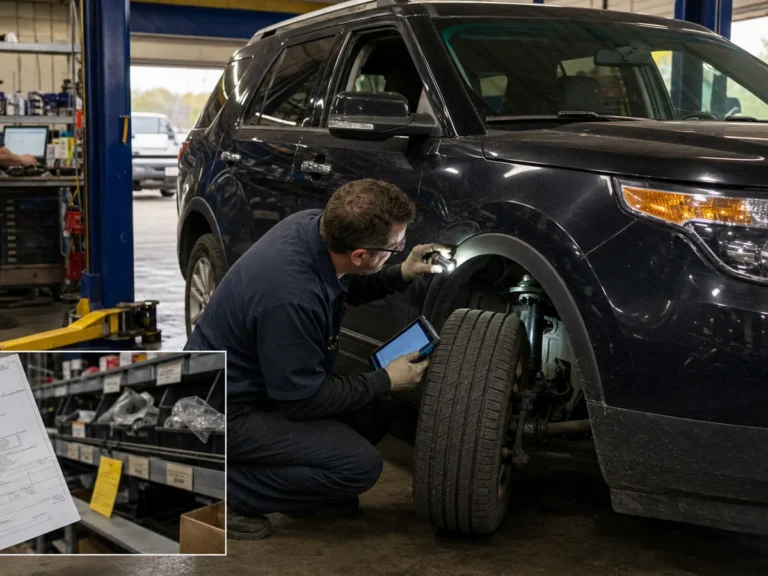
- Photograph visible damage, rear panel gaps, liftgate fit, warning messages, water intrusion, tire position, and any dragging or loose parts before teardown changes the evidence.
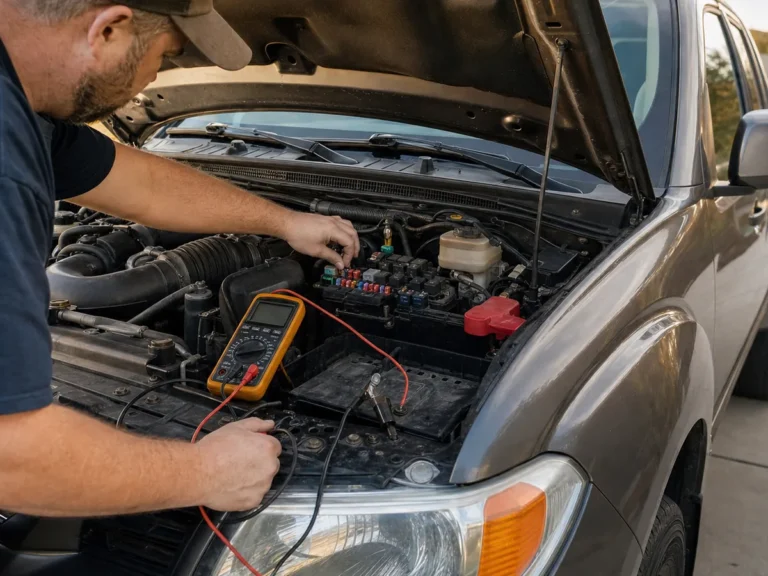
- Run a pre-repair diagnostic scan when warning lights, ADAS concerns, parking assist faults, rear camera issues, communication codes, or restraint-related concerns are present.
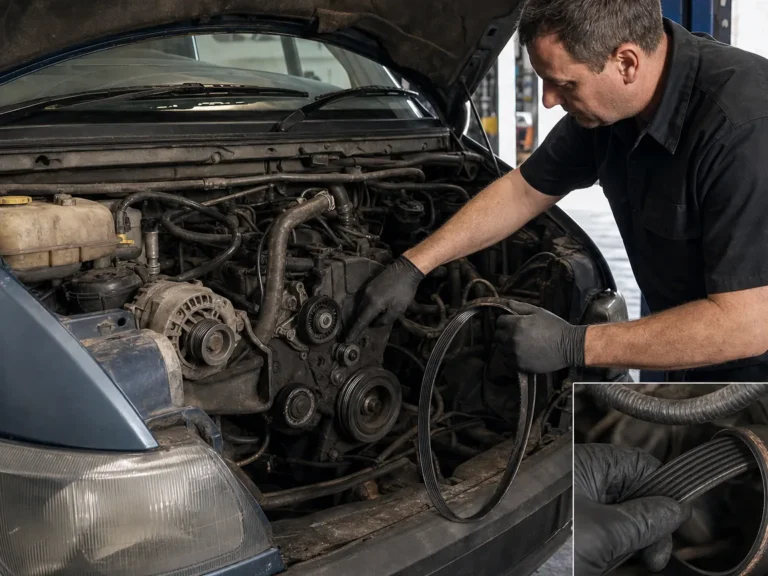
- Remove the bumper cover and related trim in a controlled teardown so the absorber, reinforcement, brackets, wiring, rear body panel, rail ends, and floor area can be inspected.
- Look up current Toyota repair information for the vehicle configuration, measurement points, repair limits, replacement requirements, corrosion protection, and calibration instructions.
- Measure the structure when teardown, gaps, closures, suspension concerns, or OEM procedure direction justify dimensional verification.
- Write the repair plan from evidence, including photos, scan data, measurement results, OEM references, parts decisions, calibration needs, and supplement support if hidden damage is found.
- Complete the repair, then validate gaps, liftgate operation, sealing, scan results, ADAS status, and final quality control before delivery.
Diagnostic trouble codes after a rear impact do not prove structural damage by themselves, but they can show that sensors, wiring, modules, or calibration-related systems need inspection. This is especially relevant when the vehicle has parking assist, blind spot monitoring, rear camera functions, rear cross-traffic alert, pre-collision features, or supplemental restraint-related faults after the hit.
A DTC should be read as a clue about a circuit, sensor, module, communication path, or calibration state, not as a body measurement. For example, a rear sensor-related code may come from a damaged sensor, broken mount, pinched harness, disconnected connector, water entry, or a sensor that is no longer aimed or located correctly after repair. A communication or restraint-related code may require a different diagnostic path and should not be cleared just to see whether it returns before the repair evidence is documented.
ADAS and electronic-system language should stay conditional unless the exact equipment and current Toyota procedure have been verified. The practical rule is simple: scan, inspect mounting points, follow OEM repair information, calibrate when required, and document the result visibly in the repair file.
Measurement documentation can support an estimate supplement when teardown finds hidden damage that was not visible during the first inspection. It does not guarantee insurance approval, but it creates a clearer technical record than a verbal claim that the vehicle looks crooked.
A first estimate is often written from exterior visibility. That can be appropriate as a starting point, but rear collision damage can change once the bumper cover, absorber, trim, lamps, and brackets are removed. If the hidden findings show reinforcement damage, rail-end movement, rear body panel deformation, wiring damage, sensor mounting problems, or floor distortion, the repair scope should be updated before final repairs are authorized.
- Photos of visible damage, panel gaps, liftgate fit, and teardown findings.
- Pre-repair and post-repair diagnostic scan reports when electronic systems are involved.
- Measurement findings or printouts when dimensional verification is performed.
- Current OEM repair information references used to plan structural, corrosion protection, or calibration work.
- A written estimate supplement that explains why hidden damage changes the repair scope.
If the insurer lists the damage as bumper-only but the RAV4 has liftgate alignment issues, uneven gaps, warning lights, water leaks, tire rub, or hidden reinforcement damage, request an estimate review before authorizing a cosmetic-only repair. The goal is not to inflate the repair; it is to make the final repair scope match the documented damage.
Used parts can make sense only when the part matches the vehicle, the repair plan allows it, and the part is not hiding impact damage of its own. For a rear-ended RAV4, used bumper covers, lamps, liftgate trim, brackets, or other bolt-on parts should never substitute for structural verification when the mounting body points are suspect.
- Confirm the part matches the vehicle configuration, trim, sensor openings, lamp style, harness routing, and mounting provisions.
- Inspect mounting tabs, clips, brackets, connector shells, sealing surfaces, and plastic stress marks before accepting the part.
- Reject parts with hidden collision damage, water intrusion, bent mounting points, prior repairs that are not compatible with the repair plan, or damaged wiring.
- Use extra caution with sensor-adjacent parts because bracket position and mounting accuracy can affect warnings, calibration, and system operation.
- Do not use a recycled bumper cover, lamp, bracket, or trim piece to avoid measuring a body structure that may have moved.
The third question is whether the used part is appropriate for the job. Structural parts, calibration-sensitive mounts, reinforcement-related pieces, and any component controlled by current OEM procedure or insurer authorization should be handled through the repair plan, not bought casually to make the estimate look smaller. If the structure is out of position, even a perfect used bumper cover or lamp will not solve the underlying measurement problem.
The right questions keep the repair discussion focused on evidence rather than guesses. A shop does not need to claim structural damage before inspection, but it should be able to explain when it measures, how it documents findings, and how it follows current OEM repair information.
- Will the bumper cover and related trim be removed before the final repair scope is approved?
- What findings would make structural measurement necessary on this RAV4?
- Will the repair file include pre-repair and post-repair scans when electronic systems are involved?
- Which current Toyota repair information will be used for measurement points, repair procedures, corrosion protection, and calibration requirements?
- How will liftgate fit, rear gaps, water sealing, rear sensor mounts, and suspension-related concerns be verified after repair?
- If hidden damage is found, what photos, measurement findings, scan reports, or OEM references will support the estimate supplement?
A clear answer does not have to be dramatic. The strongest repair plan usually says what was checked, what was found, what OEM information was used, what needs measurement or calibration, and what evidence supports the final repair authorization.
If your 2025 Toyota RAV4 was rear-ended and the estimate looks bumper-only while the vehicle has gaps, liftgate issues, warning lights, leaks, tire rub, or hidden damage concerns, the next step is a documented post-collision inspection before repairs are finalized.
- Schedule a post-collision inspection if the liftgate, gaps, cargo area, rear lights, warning messages, or road feel changed after the hit.
- Request a diagnostic scan when warning lights, parking assist, blind spot, rear camera, rear cross-traffic, communication, or restraint-related concerns appear.
- Request structural measurement when teardown or visible fit issues suggest movement in the rear rails, rear body panel, floor pan, quarter structure, liftgate opening, suspension mounting areas, or sensor mounts.
- Ask for an estimate review when the first repair scope is bumper-only but photos, scans, teardown findings, or measurement results show deeper damage.
- Confirm the final repair includes fit, sealing, scan, calibration, and quality-control documentation before delivery.
Schedule the inspection before replacing visible parts when the mounting structure is questionable. The goal is a repair file that can explain what was checked, what was found, whether measurement was needed, whether calibration was required, and why the final estimate is appropriate for the actual damage.
Replacement notes
Replacement decisions should follow verified damage, not assumptions from the first visual estimate. Rear bumper covers, absorbers, reinforcements, brackets, lamps, sensors, liftgate parts, wiring, trim, quarter-related components, and suspension parts can all be affected by a rear hit, but each should be tied to physical evidence, scan data, measurement results, or OEM procedure direction.
| Ranked failure path | What it can affect | Why it matters |
|---|---|---|
| Bumper reinforcement or absorber damage | Bumper cover fit, brackets, impact load path, rear sensors nearby | Often hidden until the cover is removed and can justify deeper inspection |
| Rear body panel deformation | Lamp fit, liftgate lower opening, bumper mounting, sealing areas | Can cause fit and water-leak problems even when the outer cover is replaced |
| Rear rail-end movement | Structural reference points and bumper reinforcement mounting | May require OEM measurement and repair procedure review before parts are fitted |
| Cargo floor or spare tire well distortion where applicable | Rear floor shape, cargo sealing, interior trim fit, load path evidence | Shows impact energy may have moved beyond the bumper support system |
| Quarter structure or liftgate opening movement | Side gaps, tail lamp fit, liftgate latch and weatherstrip contact | Can create closure, leak, and panel-alignment complaints after repair |
| Suspension mounting distortion | Rear wheel position, tracking, tire wear, alignment, and road feel | Raises the urgency because cosmetic repair will not address driving behavior |
When parts are replaced, the repair should also verify fit, seal integrity, corrosion protection, scan results, calibration requirements, and measurement status where applicable. A part that bolts on cleanly is not the same as proof that the supporting structure and electronic systems are back within the repair plan requirements.
FAQ
Does every rear-ended 2025 Toyota RAV4 need structural measurement?
No. Very light cosmetic scuffs with no mounting damage, no abnormal gaps, no warning lights, no liftgate problems, and no hidden damage after inspection may not justify full measurement. Professional judgment and current repair information still matter.
Can a diagnostic trouble code prove the RAV4 has structural damage?
No. DTCs can show affected sensors, wiring, modules, or calibration needs, but structural movement must be verified through physical inspection, teardown findings, OEM references, and measurement when indicated.
When should the vehicle not be driven until inspected?
Do not drive until inspected after a severe impact, warning lights tied to safety systems, loose bumper reinforcement, exhaust contact, fuel smell, tire rub, compromised liftgate closure, dragging parts, or suspected suspension damage.
Why can the first estimate miss rear structural damage?
A first estimate may be written before the bumper cover and trim are removed. Hidden absorber, reinforcement, rear body panel, rail end, wiring, bracket, or floor damage can appear only after controlled teardown.
What documentation should I ask for after measurement?
Ask for photos, measurement findings or printouts, scan results, OEM repair information references, calibration notes when required, and a written explanation of any estimate supplement or repair scope change.
Comments
Be the first to add a practical repair note or follow-up question.